
Setting Up, Tips, Tools
A Guide to Buying Jewellery Tools for New Starters
Apr
This is actually quite a tricky blog post to write. Tools come with lots of variation of opinion, there are various brands to choose from, lots of price variation, and our needs as jewellers vary. However, I have put together a bit of an introduction to developing your own tool kit which will hopefully help you start setting up your own workshop space.
You might need a cup of tea for this, I have tried to give new starters a lot of information here to eliminate confusion.
When starting out, it can be quite intimidating to see all the tools and equipment you may need to get started at home and its quite tricky to know where to start.
You can end up spending a lot of money kitting out a workshop, but before chucking hundreds or even thousands of pounds at your new tool addiction, its best to step back and consider each purchase, shop around for good deals, and look for others selling tools second hand. It’s also worth really deciding if this is a serious hobby, a future career, or something you will dabble in from time to time. You don’t want to spend hundreds of pounds on superior tools brands if it is just an occasional hobby.
I have seen people spend a serious amount of money setting up a home workshop only to decide a few months down the line, jewellery making isn’t for them, or they have no time to fit it in around family and or work commitments.
You can actually get away with making a wide range of projects using a small set of affordable tools when you start out. It’s easy to get carried away purchasing tools and gadgets you think you might need that quickly become lost at the back of a drawer, never to be used again. Some people will also buy all the tools for a certain technique, yet never spend the time to put that technique into practice, leaving the tools as a costly investment lying around unused.
Starter Kits:
Some suppliers such as H S Walsh and Cookson Gold offer student tool kits for those starting out.
Below, I have put together a list of tools that I think are quite handy to get you going. From here you can develop and add to your collection. People’s tool choices are very personal, so feel free to do your research before you purchase your tools, this is merely a guide.
Also its worth considering we are all unique in our project choices and direction. For example, Lesley one of our students does a lot of fold forming work, therefore hammers and punches are a must for her designs, however students such as Jackie from our Wednesday class likes creating more delicate stone set designs, therefore stone setting pushers, burnishers and a bull stick are some of her favourites. Therefore start out with the basic kit and then have a play to find out what direction you pursue.
If you should make a wrong turn (I shouldn’t say that at all, nothing is a wrong turn, it’s all development and playing) and you invest in a set of tools which you no longer want, sell them on, the second hand market for jewellery tools is good.
It is also really important you consider saving for better quality tools. Swiss and Italian tools are made with quality in mind, the materials used to make them are superior and their finish and function is fit for purpose. If you invest in ultra-cheap tools, not only will you need to replace them sooner, but you will also find the quality of your work suffers. This being said, there is a balance to judge here…
Here is my starter kit list:
Adjustable saw frame and saw blades
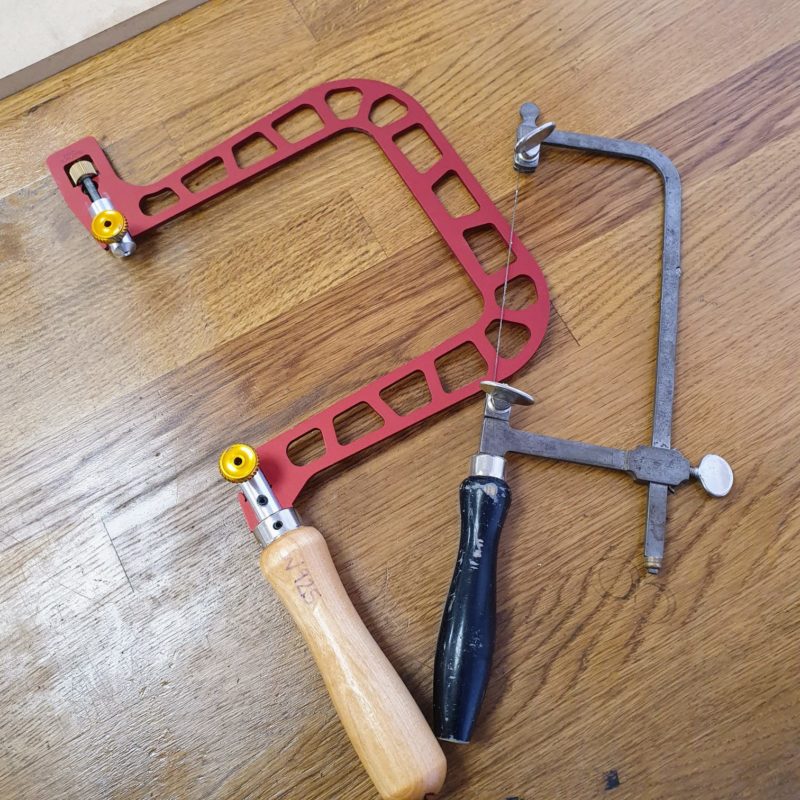

The basic saw frame model (pictured above with the black handle) is generally around £12 depending on the supplier and size. These saw frames are useful for many projects, in fact my basic saw frame is still in use and one of my favourite tools. You can purchase larger saw frames which provide a larger depth for piercing bigger sheet metal.
As you develop, you might discover more expensive saw frame models such as the Knew Concepts saw frames or Green Lion saw frames, these are good for those who pierce (cut out) metal frequently. These more expensive models boast a lighter weight saw frame (lighter on the wrists which is always good to avoid strain injuries) with arguably superior qualities such as better handling. I have tried the Knew Concepts saw frame and I am still very much attached to my trusty basic model.
You can buy a multi pack of saw blade sizes initially which contains one bundle of each size blade so that you can get used to the saw blade size you need for the thickness/gauge of metal you use regularly. These are available from many suppliers. You can then decide which size you use the most and wish to purchase more of. I like 6/0, 2/0, 2 and 4 personally for the majority of my projects.
Purchase good quality saw blades, cheaper brands break more easily, snag against your metal, blunt quickly and don’t produce good results. Remember invest in your tools and you will see your quality of work shine. Super Pike are good blades to purchase.
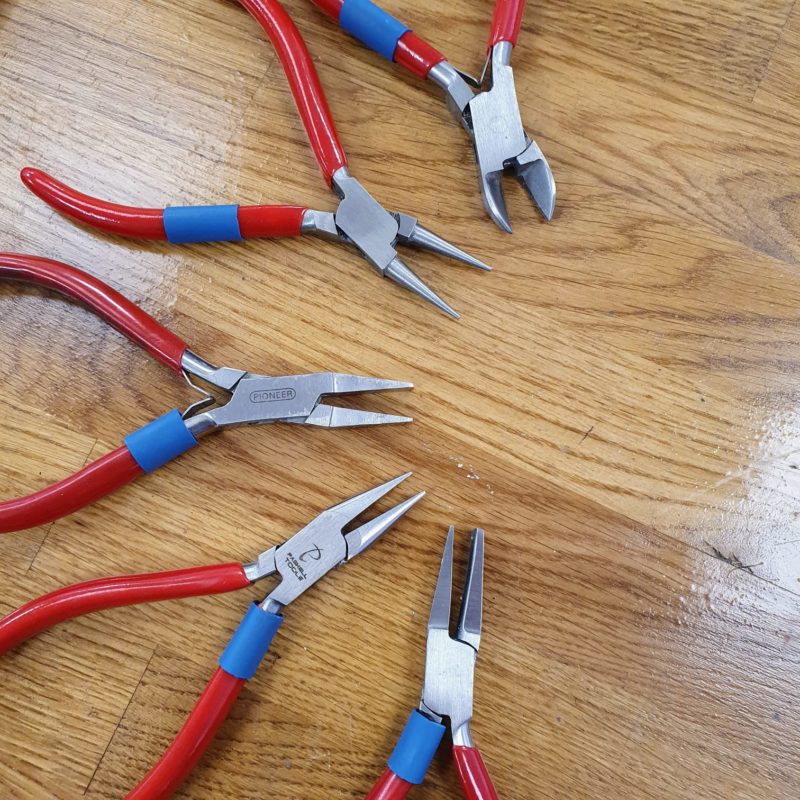
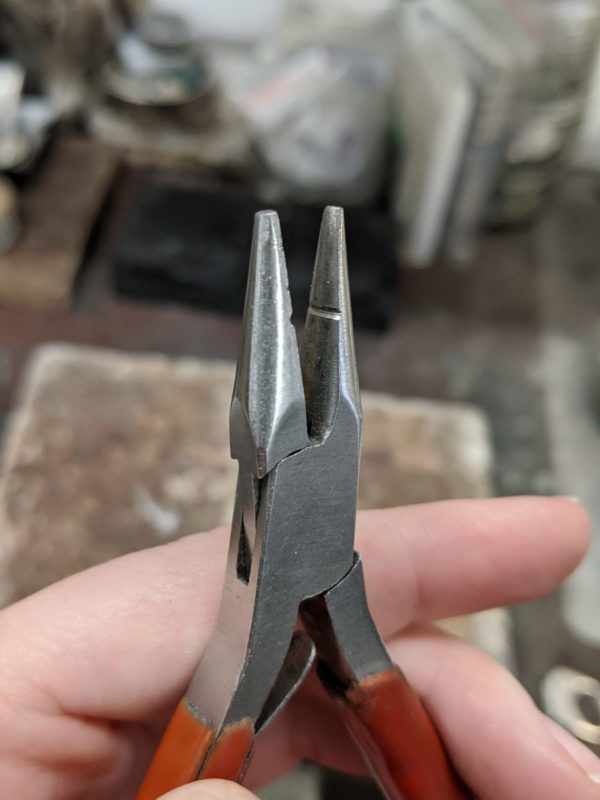
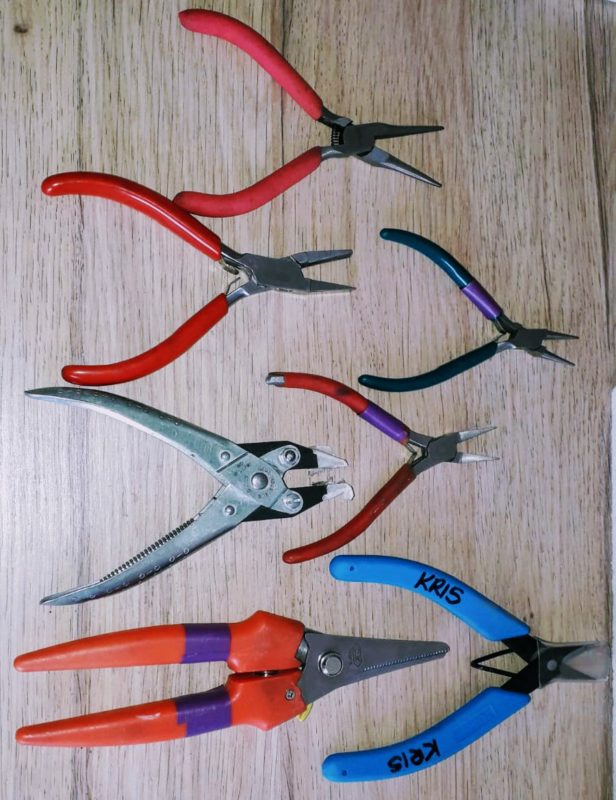
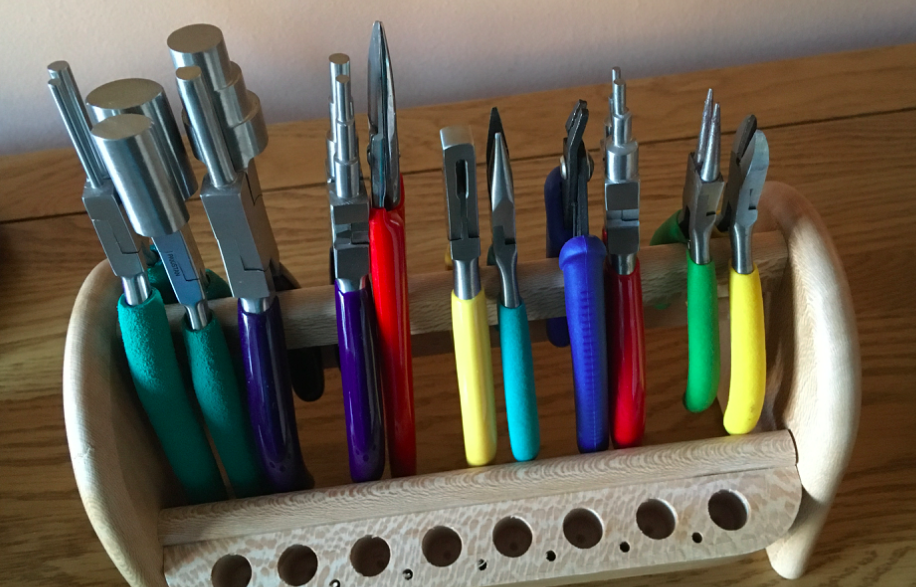
Set of Pliers
Don’t go ultra-cheap here. There are some great pliers you can buy from brands such as Tronex and Lindstrom; Wubbers can be good also, these are examples of very well-made pliers, they are around £40 a pair and are just amazing (don’t worry I’m not nuts, wait until you get tool addiction, you will be able to sport the difference in tool quality). These brands are the sort you can develop onto once you are established and you feel you need a very special pair, I think I only own one pair of Lindstrom.
Most of my pliers are generally the £10- £15 mark. I have purchased the odd cheaper pair on eBay over the years, but they always end up snapping, the rubber handles come off and generally they never last. Cheaper materials are used to make them, remember going ultra-cheap with your tools never pays off in the long run.
I still have my initial plier set the 130mm 5 piece set, of course I have collected many more over the years, but investing in a good starter set has meant they have lasted and they are reliable, no ends have bent and they haven’t seized up.
Each workbench at Workshop 925 is armed with a set of these pliers, they are essential kit.
Flat File Cut 2 and Half Round Flat File Cut 2
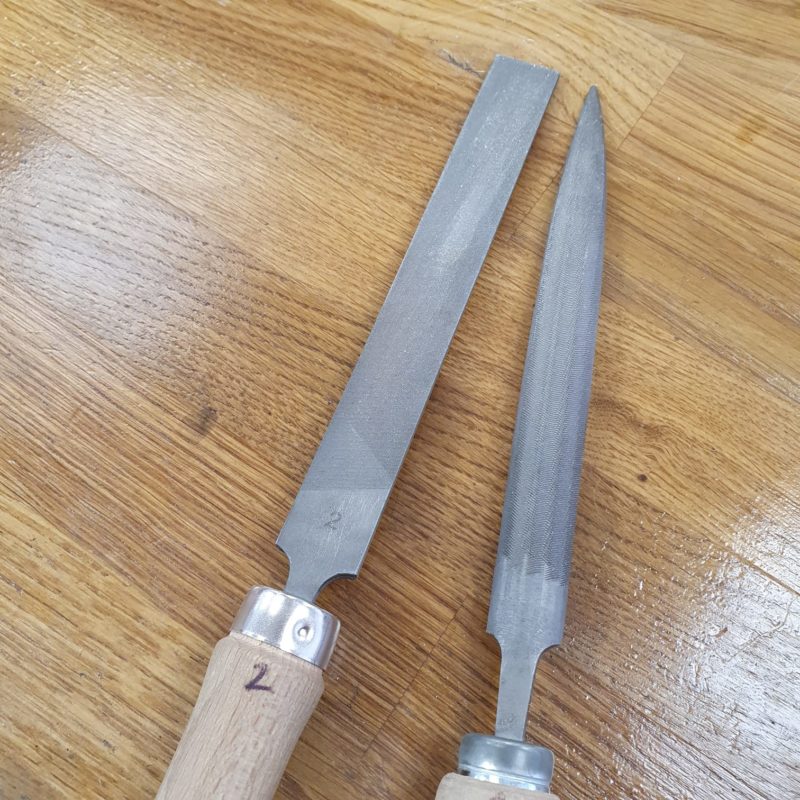

Over time you will end up getting a few files of different grades. A grade 0 is quite coarse and great for taking the excess metal away quickly, and a grade 4 is great for subtle shaping. Therefore the middle ground grade 2 is a great starting point. Go for a brand such as Vallorbe (these can be found through most tool suppliers) and they will last forever, or at least a good period of time. A flat and a half round will see you right through a range of projects. I use my original files all the time.
Wooden File Handles
You might want file handles for your files for comfort when holding, I actually haven’t bothered with many of my files in my home workshop, I feel that might be a personal preference, but remember to look after your hands. Make sure you avoid putting any pressure on them and on your wrists, if a handle helps your posture and hold, it’s worth it, for me handles don’t give me the control I like. Handles are inexpensive at a few pounds each.
Steel Scribe
A scribe is a great tool for marking your metal. Over time your sharp end will become blunt, but this can be filed to a sharp point once more using a grinder or file.
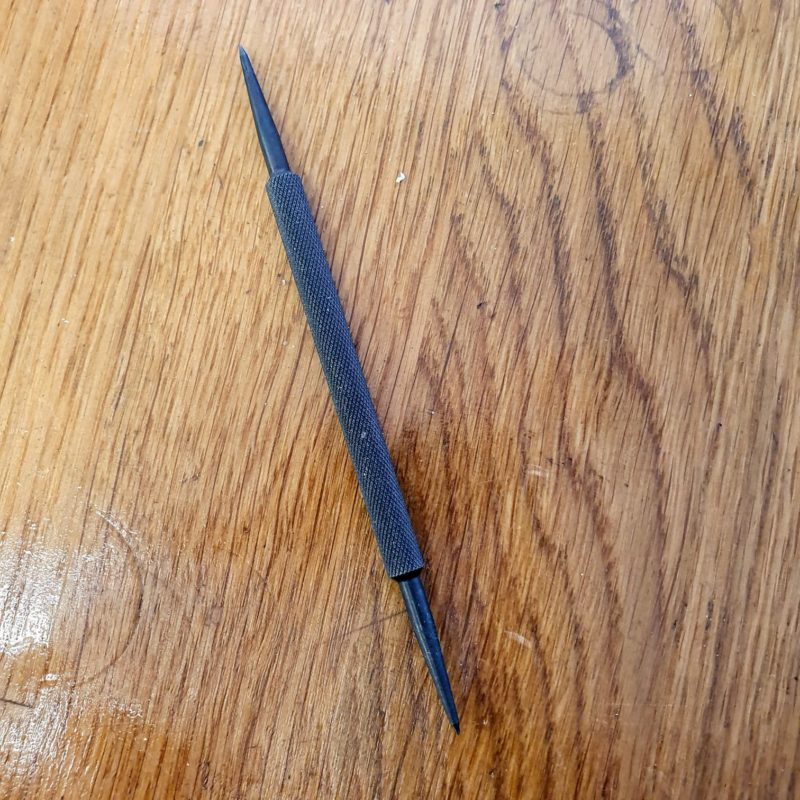
Needle Files
The trusty needle file is an absolute must. Again, a set of grade 2 is a good starting place. I have built up a bit of a collection of needle files and escapement files for small work. The needle file is good for refining smaller areas and gives a little more delicate control versus the larger hand file.
Escapement files and Broacher files are a great addition at a later stage for those who venture into creating more delicate designs, these are even smaller files which will help you get into difficult areas. They are a little more pricey, so not worth investing in until needed. A set of standard needle files is perfect for those starting out.
Steel Ruler
A steel ruler is inexpensive at around £4. This is a great hard-wearing tool which is good for marking out and measuring.
Emery Paper/ sticks
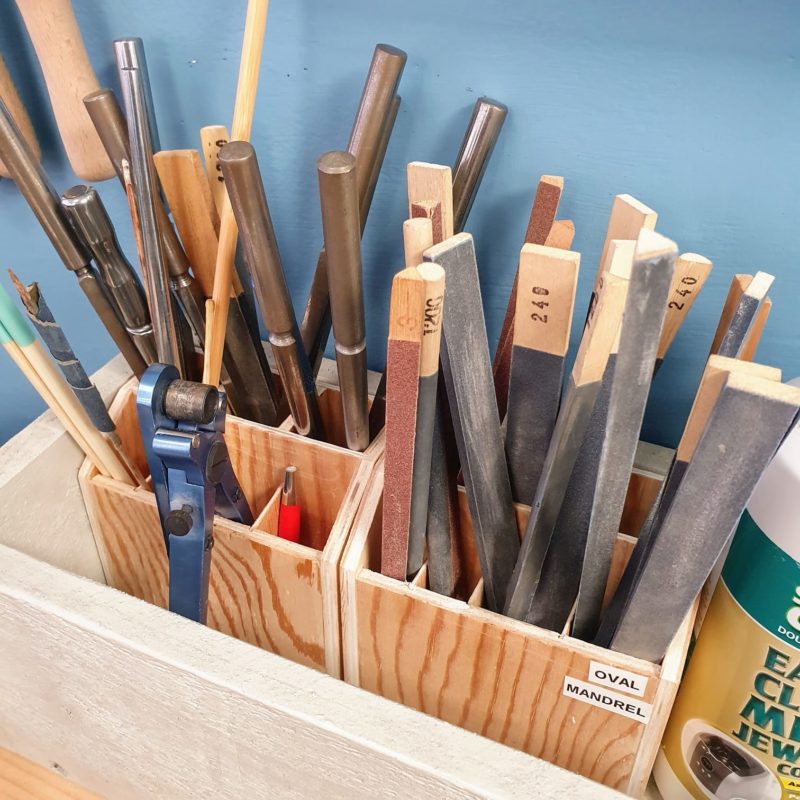
Emery paper (wet and dry sanding paper) is an absolute must to have in the workshop. You will need it for pretty much every project. It can help you refine edges, polish, texture, form your shapes, dull down sharp areas etc. Some brands that create good papers include SIA Swiss abrasives and Matador. Matador is my own personal favourite but shop around and find your favourite papers and methods to clean up your work. It’s quite an odd thought to have a favourite emery paper, but there you go!!
Emery sticks are essentially emery paper stuck onto doweling. You can buy pre-made emery sticks. Instead of throwing them away when the emery paper wears away, rip off the old emery paper, stick double sided tape over the dowelling, and attach new emery paper, scoring any edges with a Stanley knife to give a crisp edge to fold round. Others tend to wrap their emery paper around their dowelling and use elastic bands on each end of the emery stick to hold it in place rather than using tape.
You can also purchase emery boards which are similar to emery sticks, but look more like nail polishing boards, some prefer these as they are shorter and lighter. Remember, you can always make your own cut to size dowelling, stick double sided tape to whatever works for you, stick on your paper and off you go. You could try ice lolly sticks for your emery papers fo a smaller option.
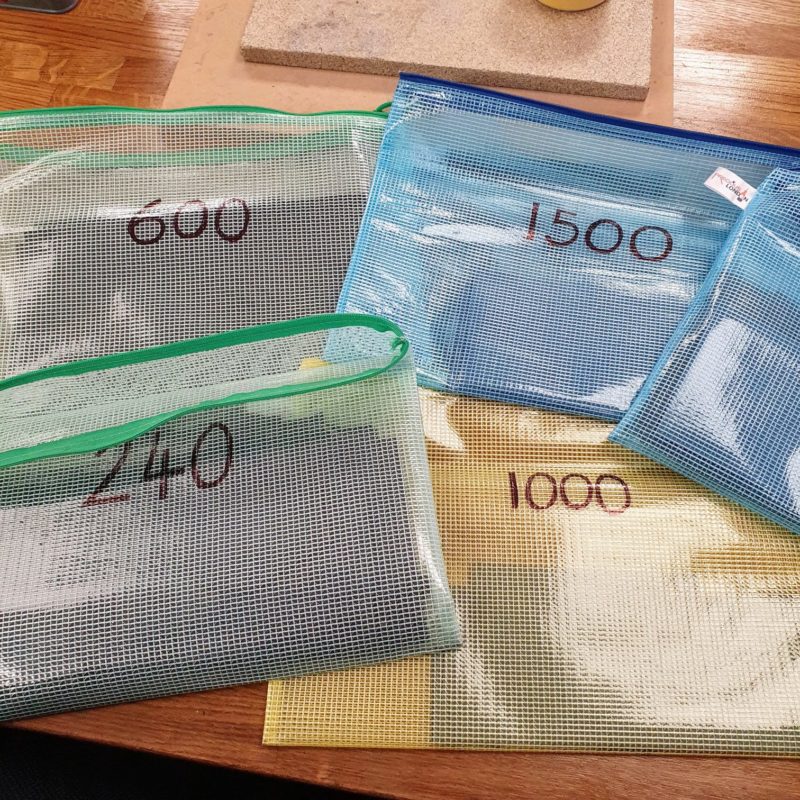
You can have a variety of grades of emery paper on the go, ready to hand for your projects as and when you need them. For our emery papers, we store each grade in a zip folder with the grade number on the front so it is easily found when required.
The coarser the grit, the lower the number marked on the paper, however you can feel if a paper is rough or smooth to touch. A coarser grit paper will take away the metal at a quicker rate. For example, a 240 grit is relatively coarse and I will use it to take away the initial tool marks during polishing, working my way up through the grades to a finer grit of around 2000 which is a much softer paper.
I sometimes use 3M polish papers which go up to 8000 grit when I am after a mirror shine. These are more expensive than a standard wet and dry emery paper but they are almost like a cloth material so really easy to bend and manipulate.
Raw Hyde mallet
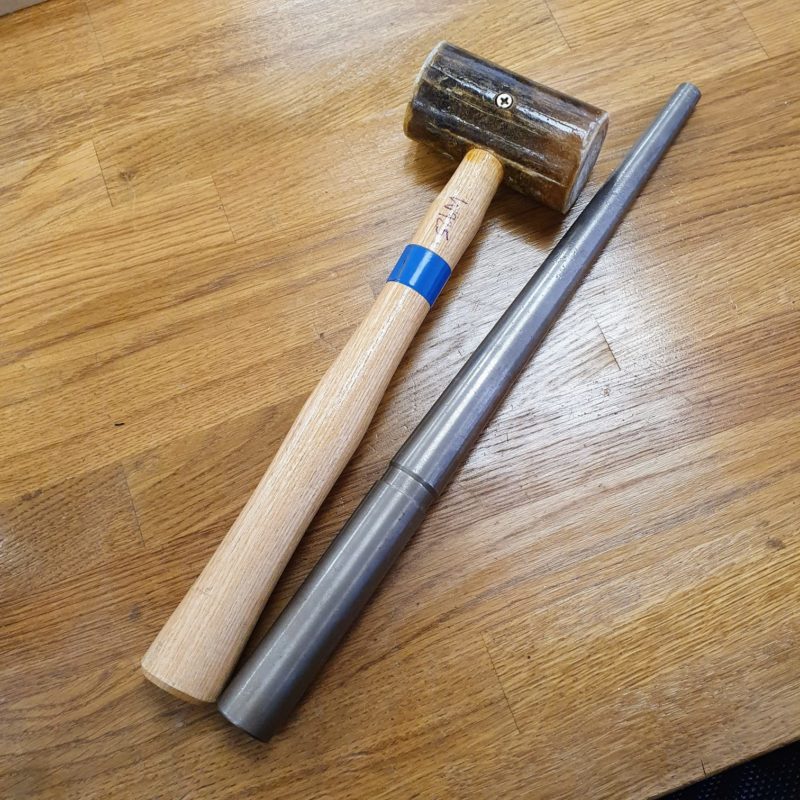
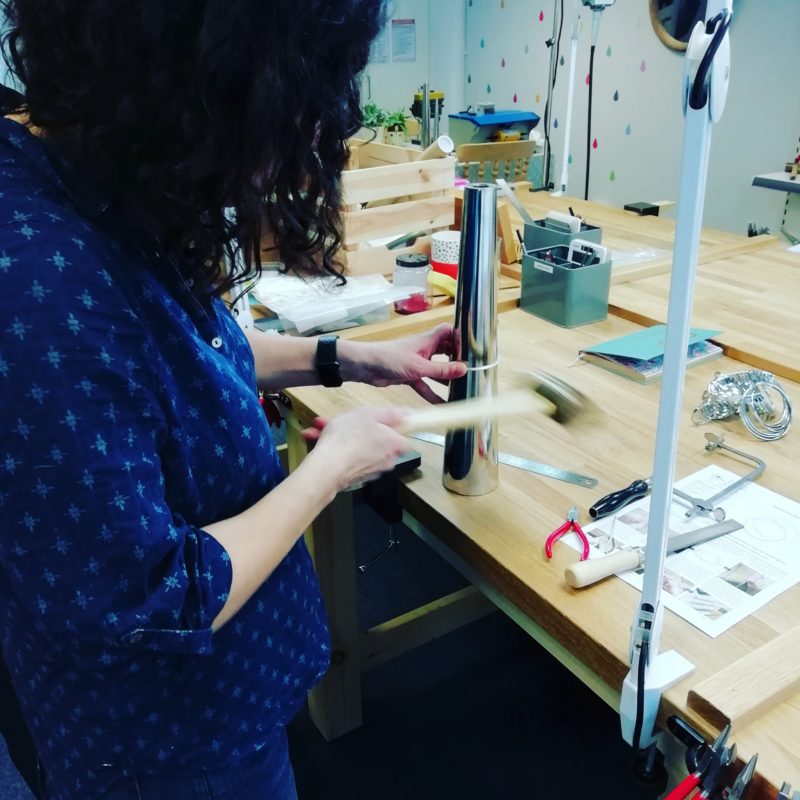
Your raw hyde mallet is really good for shaping your metal without leaving marks. They are generally made from water buffalo hyde.
We have size 3 and 4 mallets. These are a good weighty size to tap bangles and rings into shape upon mandrels and they are effective for thicker gauges of metal.
If you were to use a steel hammer to form your ring or bangle shape, you would end up texturing and stretching your metal rather than just forming the shape.
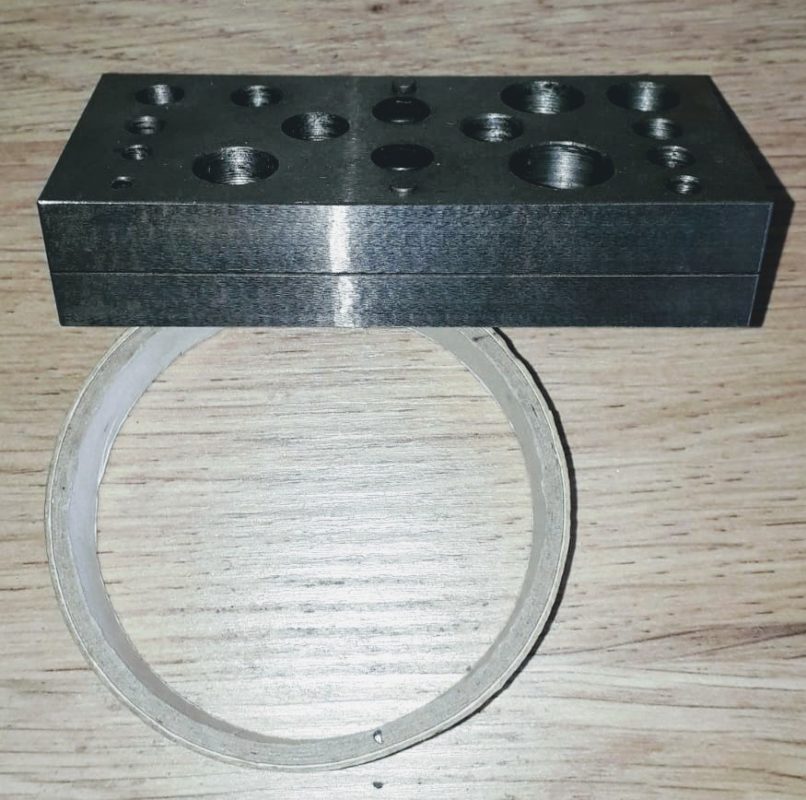
Ring Mandrel and Bangle Mandrel
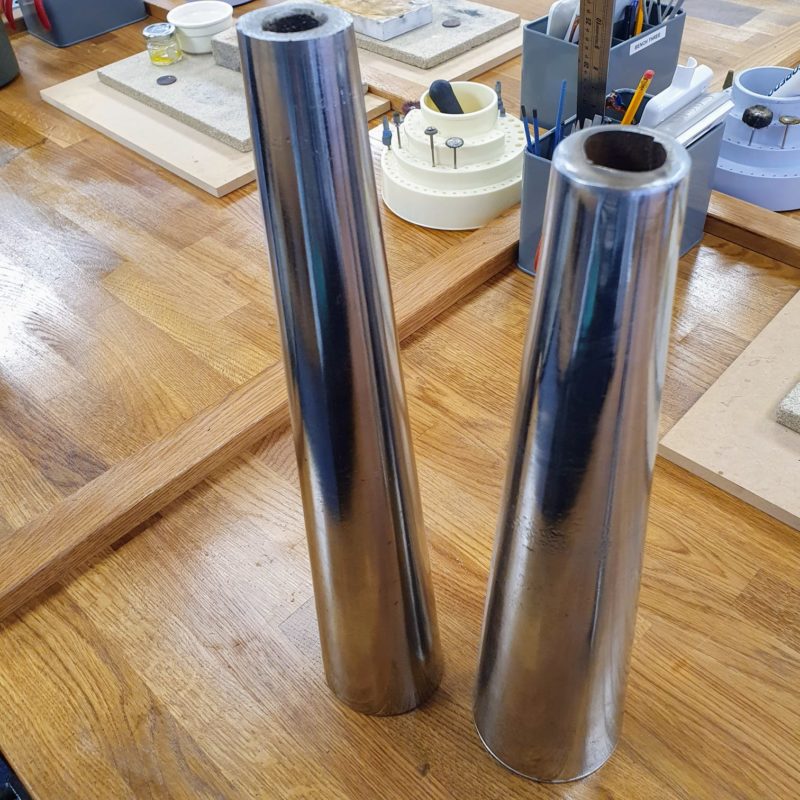
These tools are essential for forming the shapes of your rings and bangles. The ring mandrel can also be used for rounded pendants and chain links. We ordered ours from Proops Brothers Ltd, they are affordable and really good to help you form the shapes you need for many beginner’s projects. As you progress you will find you use them all the time so they are a worthy investment.
Pictured here are two bangle mandrels, oval and round which we purchased for around £36 as a set from Proops, I was nervous of their quality but they are fantastic.
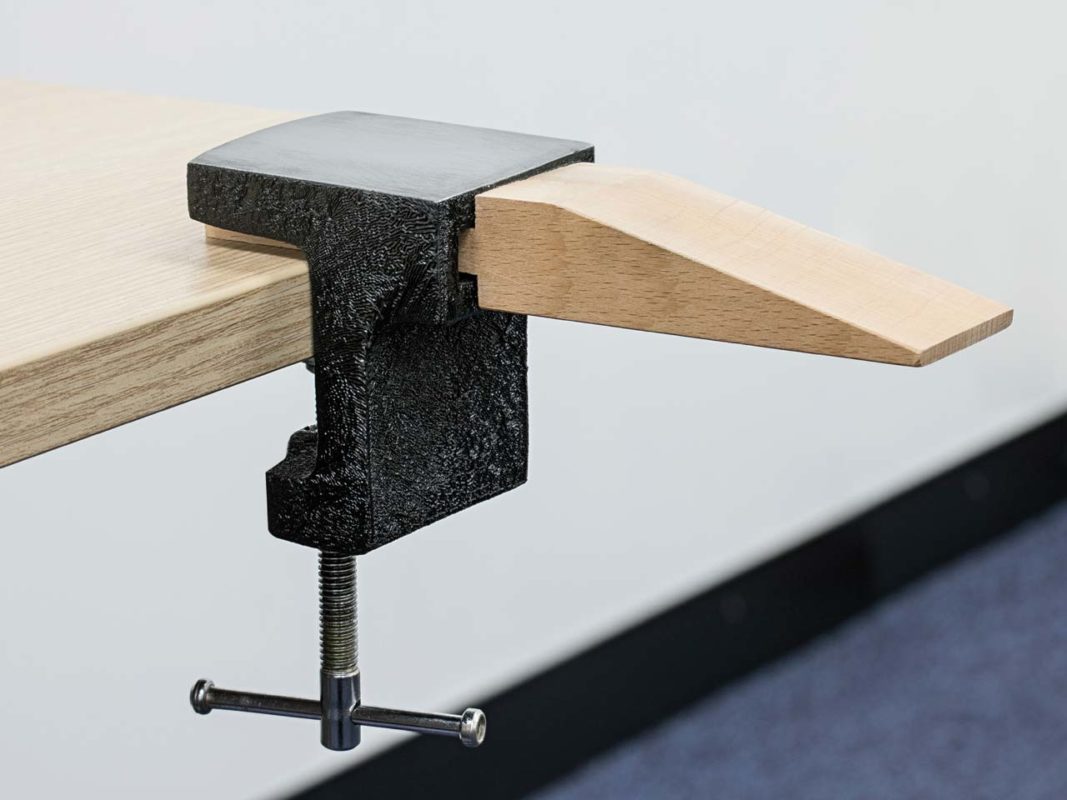
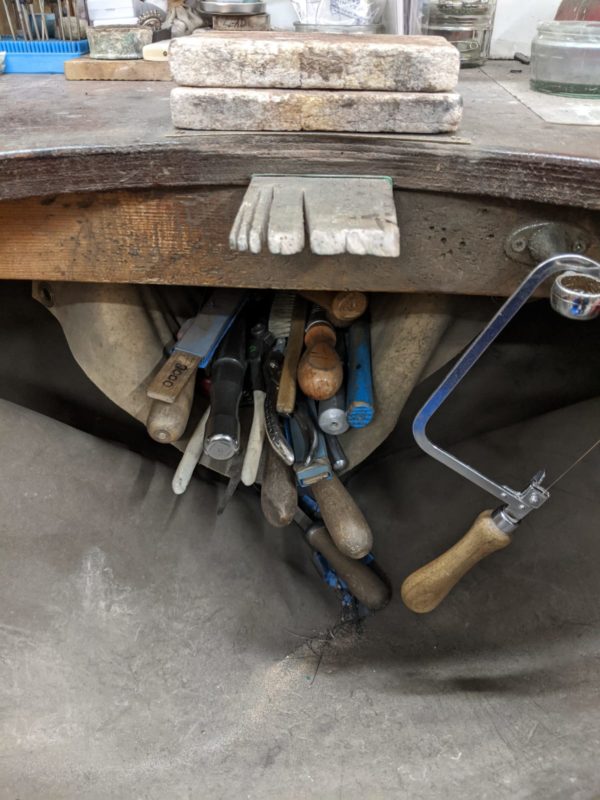
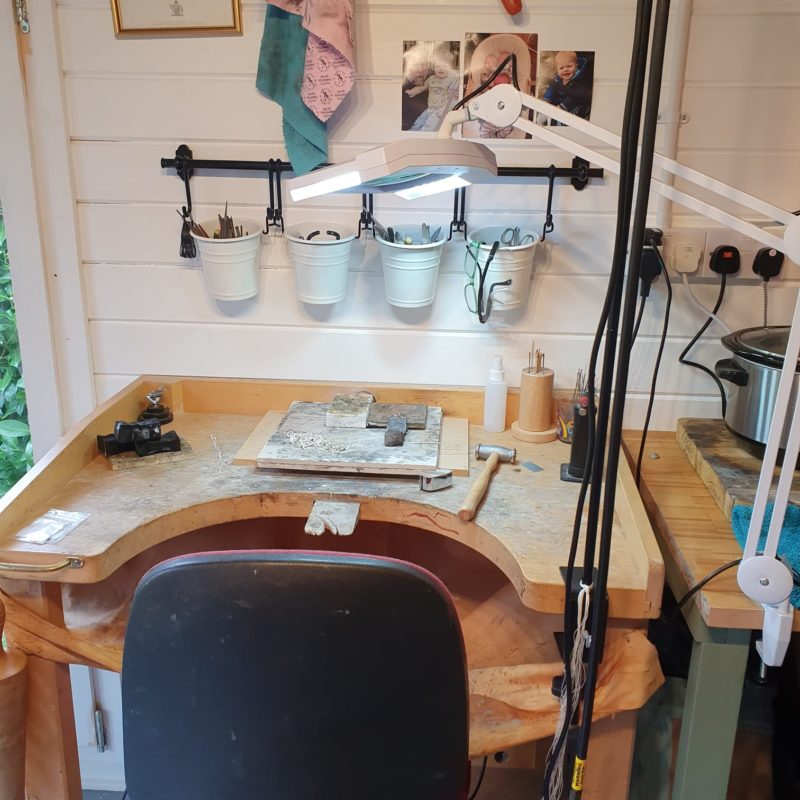
Bench Peg and Anvil
These screw on bench pegs are a really good and cheap bit of kit for a new starter, unless you have a bench with a peg already in situ.
Before you purchase one, make sure its maximum opening width will fit onto your chosen workbench.
Considering you will do the vast majority of your making upon a bench peg, this is a key essential in your workshop.
Bench pegs come as a solid blank canvas. You can file, drill, and cut your own notches into it to support your work. Most jewellers will start by cutting a v shape incision into their peg to give a clear working area with two solid sides to support their work.
A jewellers bench peg is unique to them and how they work, I love nothing more than seeing jewellers bench pegs and how they have worn over the years.
Soldering…
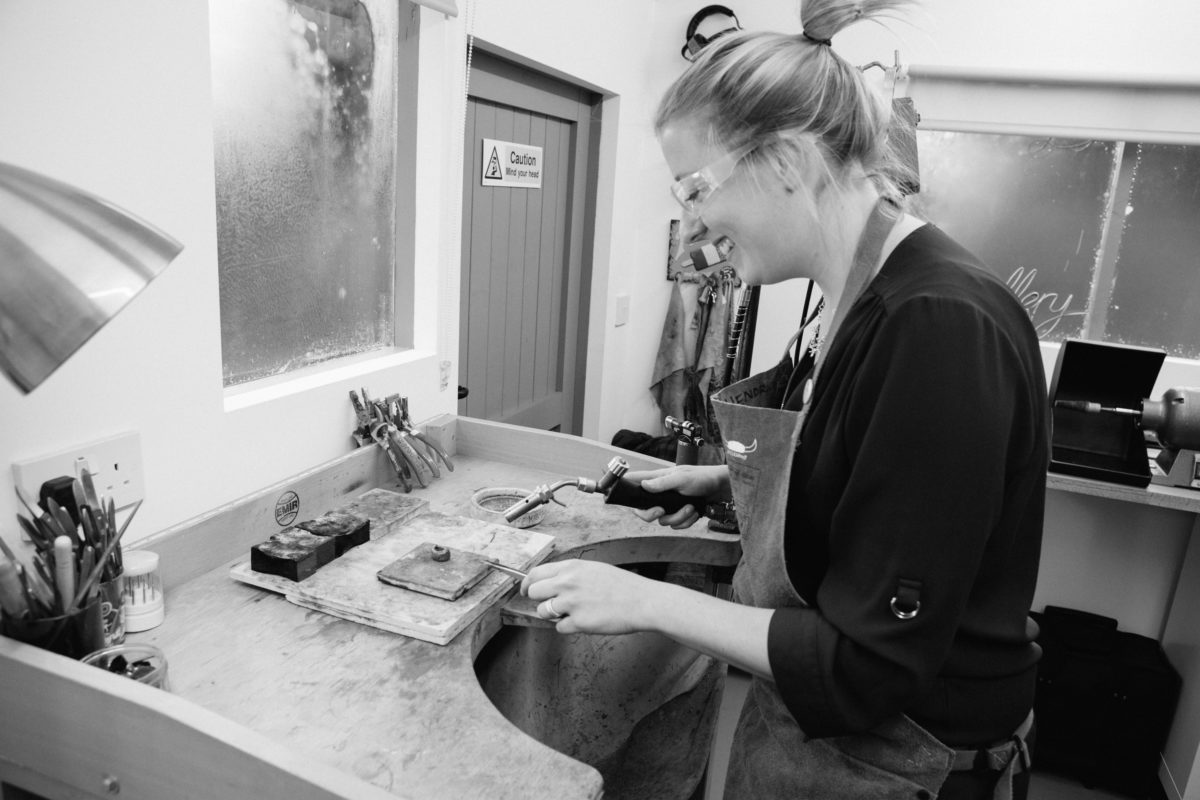
Before we head into the soldering equipment set up, I would say to enter the technique of soldering with a calm attitude. I see a lot of people panic as soon as soldering comes into play. It’s the torch, the risk of melting work and the use of unfamiliar chemicals which causes people worry.
Effective soldering skills comes with practice, patience and a good few fails along the way. The challenge of soldering is something that can be exhilarating. This is the point where you transform your work from a series of pieces and begin to construct it into an actual piece of jewellery.
Stay calm when you solder, keep your eyes open, watch all areas of your metal to check something isn’t picking up too much heat causing it to glow and melt, and just go for it. If you do melt it, learn from it and develop your skills.
A last point on this, work in a ventilated area and think about your health and safety when handling chemicals.
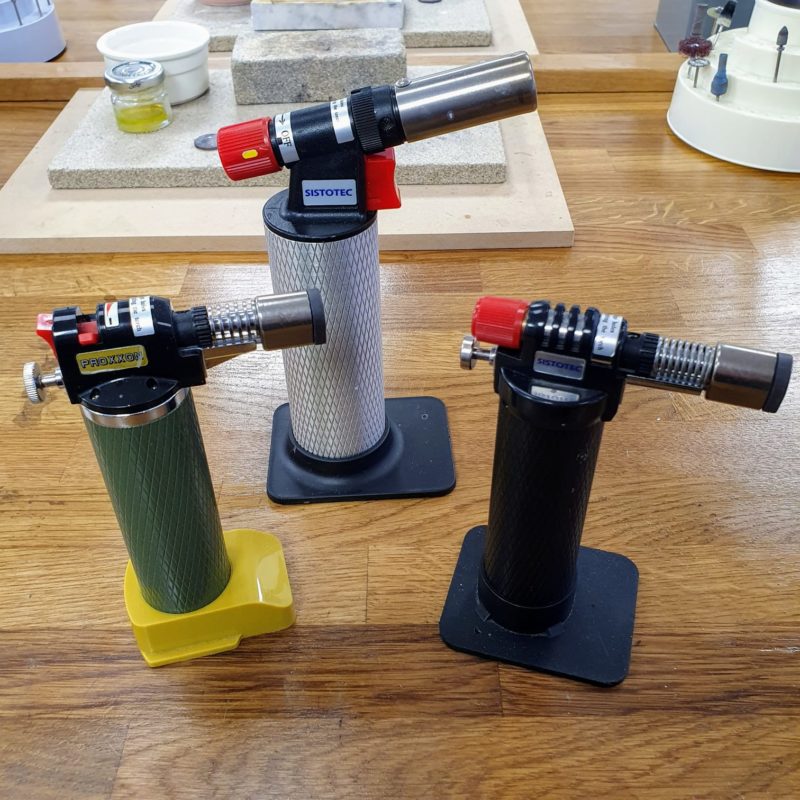
Torch
As a starting point, a hand-held butane torch is good. Cookson Gold sell Sistotec, Proxxon and Dremel versions. These are inexpensive, easy to use and also have a small flame so feel safer to use initially. They can be less intimidating than larger models, and cost around £30-40, so really affordable to get making. You can solder rings, chain links, earrings, cufflinks etc with this torch size. For a bangle you may need a larger torch, but you can buy a larger version of these hand torches for bigger pieces. I still use my Sistotec torch for many projects as its light weight and easy to handle without gas lines running from it.
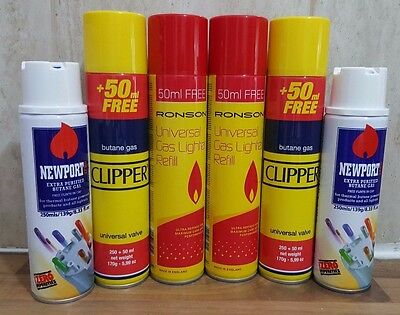
You can purchase butane gas lighter refill bottles from Amazon, eBay or camping outlets. Clipper, Newport or Ronson are usually good brands. Be careful, some camping gas refills aren’t compatible and have a quite nasty smell to them. Always refill your torch in an area with plenty of ventilation. This also goes for soldering, make sure you have a window open or good air flow, look after your health.
As you develop further, you might move onto a Little Smiths Torch or Sievert or something similar which requires more of a permanent gas set up and more thought with your risk assessments and gas storage. Also worth noting that this can affect house insurance, so please check you are covered if you are working in a spare room within your house. These larger torches come with a bigger price tag, so move up when you feel ready, don’t purchase cheap fake versions, save up and buy the real deal and be safe. There are plenty of YouTube videos to help you set up your torches or you can ask a plumber to do it for you and be sure it is done correctly, they will probably be able to give you some tuition on this and teach you some gas safety tips.
On any occasion when using your torch big or small, if something doesn’t sound right, something feels off or smells like it is leaking, STOP and check, don’t carry on, something might have come loose and needs adjusting. Always take the couple of minutes it takes to check all is OK before soldering.
Soldering Sheet and Blocks
You need to protect your workbench from the heat of your torch. Blocks will do that and will also help support your work during soldering. A soldering sheet will act as a good fire-resistant larger base board, these can be purchased from main jewellery suppliers.
If you want a larger board than the general 30 x 30cm soldering board you tend to find through Cooksons etc, you can search for made to measure ‘vermiculite’. I have this at Workshop 925 as pictured below, it is a great large board which protects the whole soldering area from accidental burn damage. It means I never have to worry about fire damage from torches as the base sheet is 25mm thick. On top of this we have the soldering sheet and then soldering blocks.
Below shows our soldering area set up. We have the space for a designated soldering area where two people can stand and solder at once.
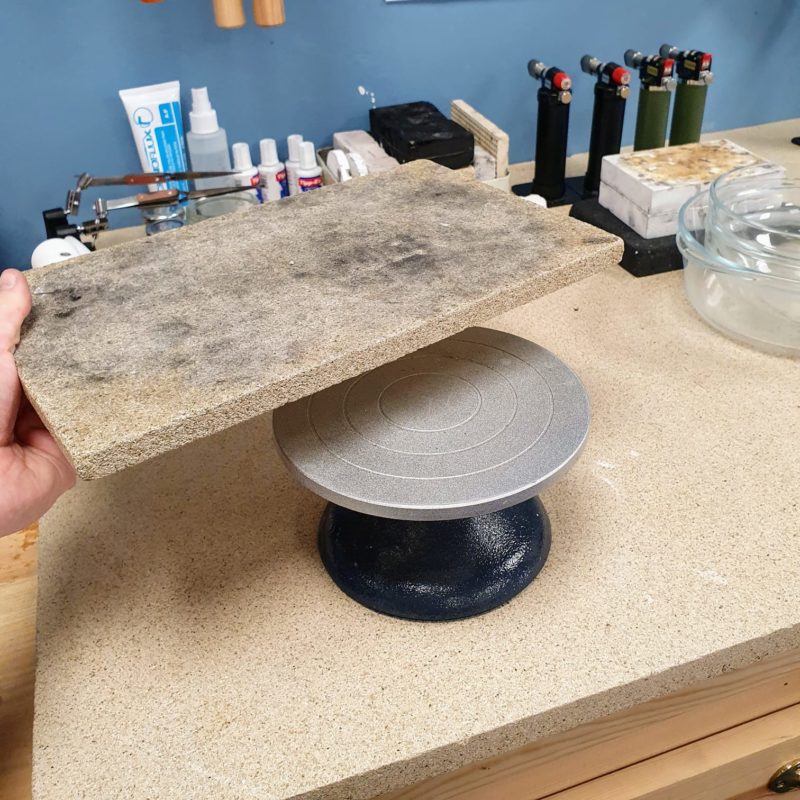
We also have a pottery turn table for our blocks to sit upon, this is quite a nice base surface for soldering as you can turn and check your work easily during the soldering process without knocking everything over.
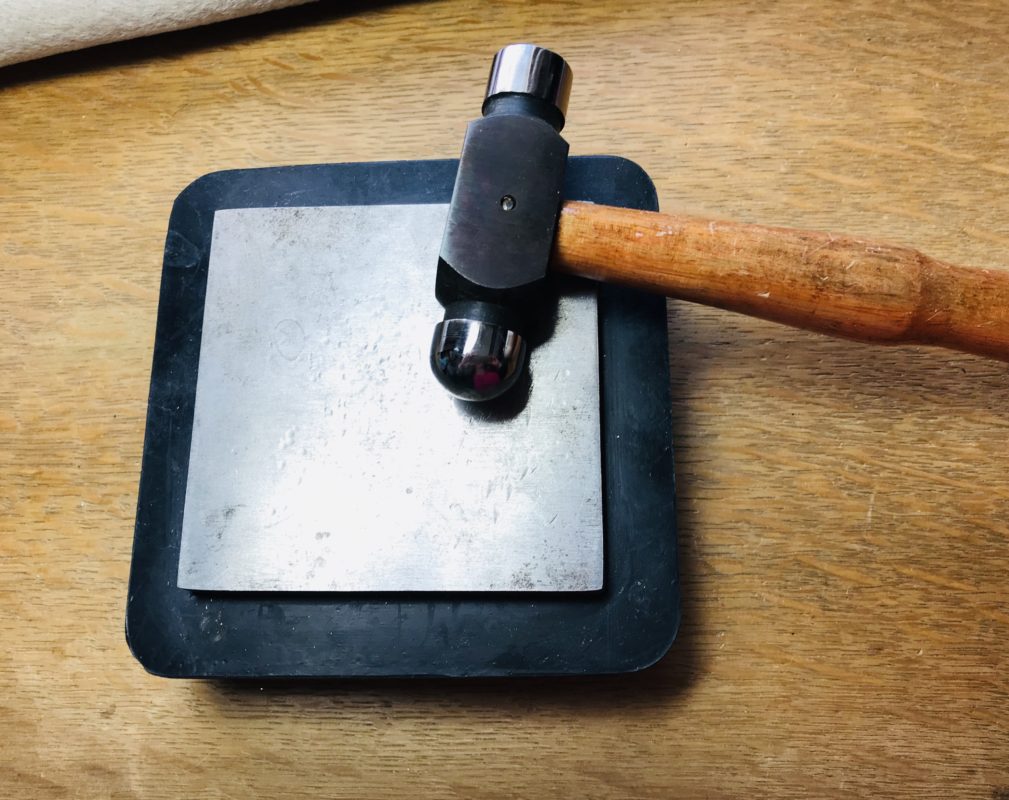
Soldering Blocks
Standard solid soldering blocks are a workshop must, they support your work and make a great surface for soldering.
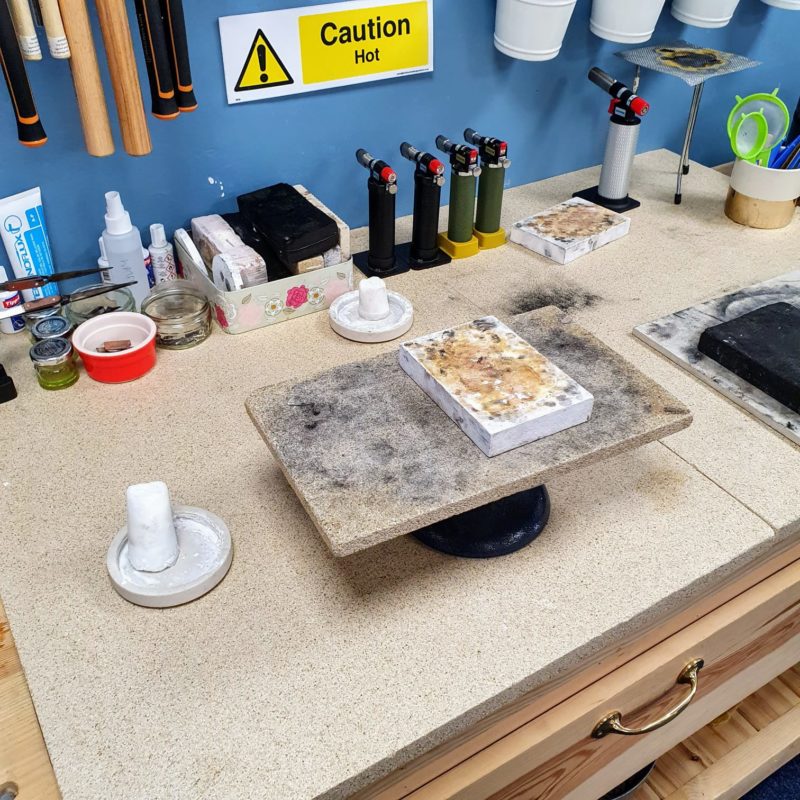
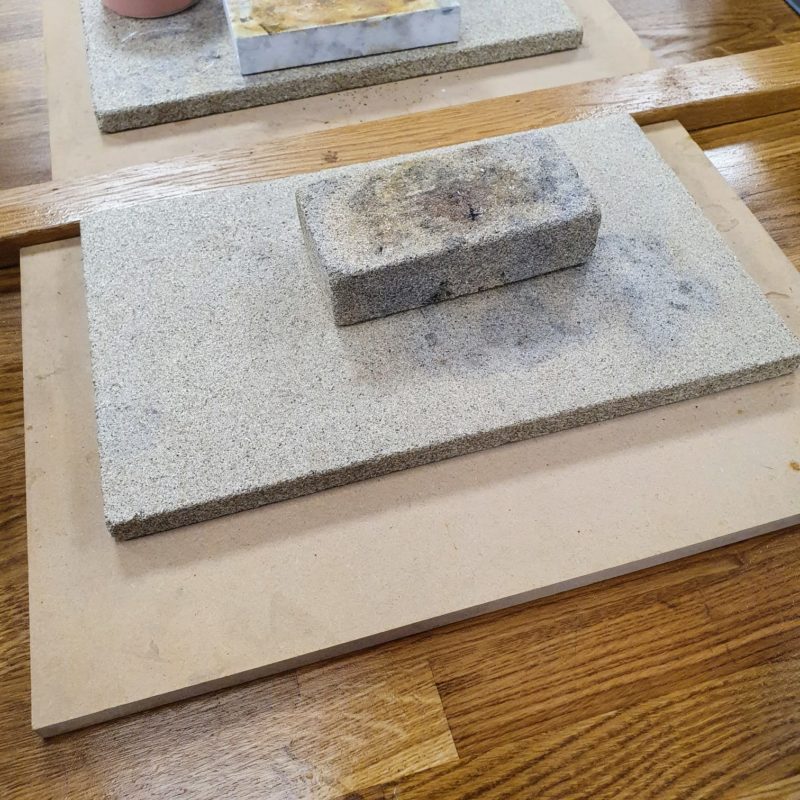
Here we have our bench top set up. These are on each and every bench at Workshop 925 as an alternative to the larger soldering area. At home, I use the bench top soldering set up as it is compact and easy to move. I do not have the space at home for the large set up pictured above.
Here we have an MDF sheet to protect our desk from being scratched by the solder sheet, it is also protects the oak benches from any heat build up. The solder sheet in between and then a standard solid soldering block on top upon where we place our work for soldering.
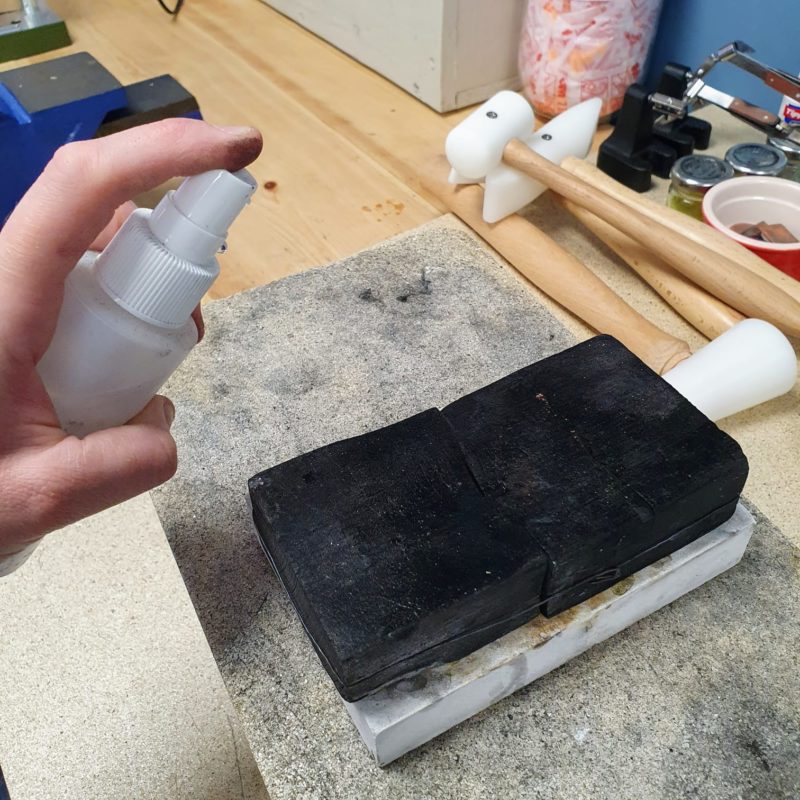
Charcoal Blocks
Charcoal blocks reflect the heat from the torch towards your silver, meaning your work heats at a quicker rate. They are good for heating larger pieces. They eventually end up breaking apart. I find spraying them with water before use helps prolong their life. You can also wrap binding wire around them to maintain their shape. Charcoal blocks can still be used even when they begin to break up, don’t throw them away, they still have lots of life left.
Charcoal blocks are also fantastic for carving into. I make many granulation balls in the charcoal block. You can use a round burr to make a round dip within the block which means your melted silver becomes a fully rounded ball without a flat base to it.
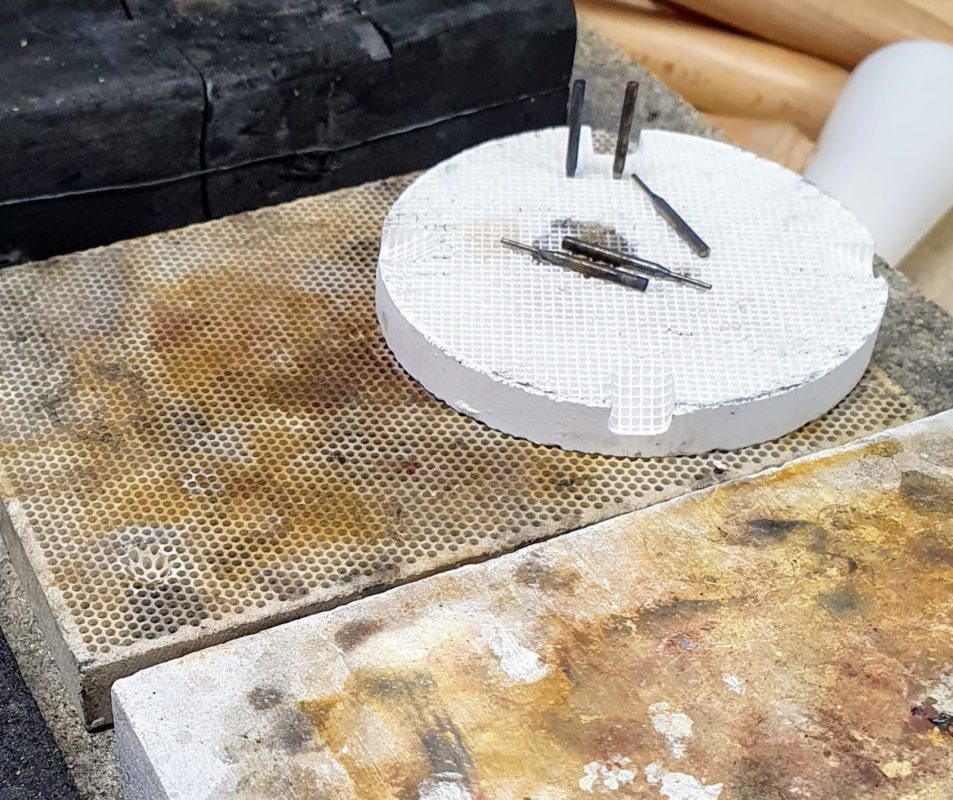
Honeycomb blocks
These are great blocks for supporting your work. You can use pins or binding wire slotted down the holes to keep your work in place. They also act as a way in which to reduce heat loss of your metal.
Solid soldering blocks can act as a heat sink and will absorb heat away from your metal, meaning it takes longer to heat your piece to a level where the solder will flow. The holes of a honeycomb block remove a big amount of this heat absorbing surface meaning your metal will heat up at a quicker rate. These are good for larger or thicker pieces that take more heat to solder. However these blocks are not advised for delicate pieces which can melt easily, sometimes a solid block is good as it removes some heat for you and allows you time to solder without risking melting.
Steel Tweezers
Steel tweezers allow you to pick up solder to put it into place, move your silver into position, give things a little nudge mid solder etc. You can pick up steel tweezers anywhere, but again the super cheap varieties tend to bend and break apart quickly.
As my tweezers wear over time, I use a bench grinder to sharpen and shape them again rather than throw them away. You can get a lot of life out of tweezers. If you don’t have a bench grinder, you can use a file. I have a large file I use for tool shaping only, this does the same thing.
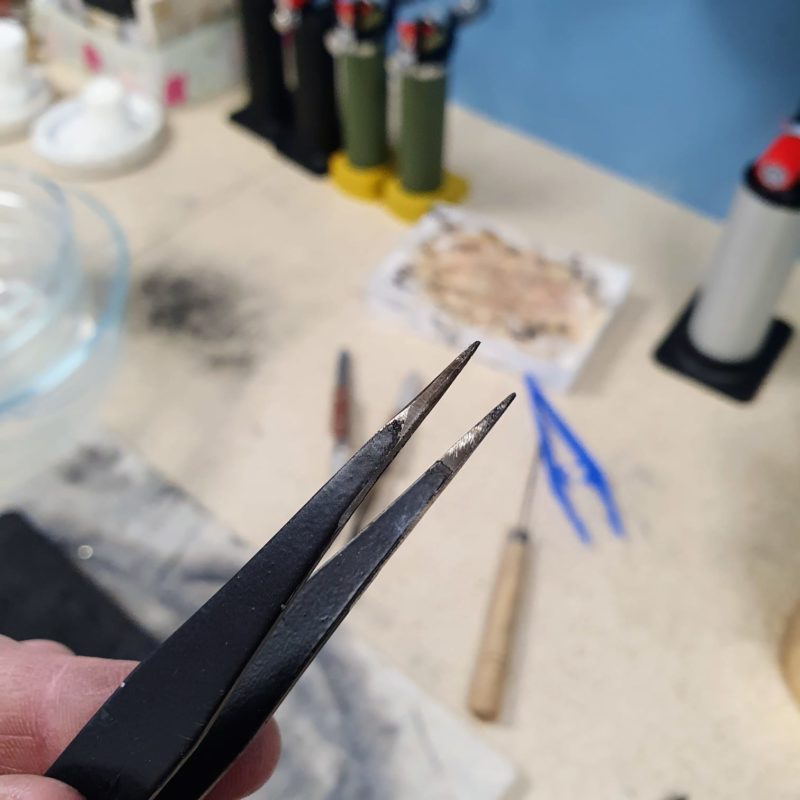
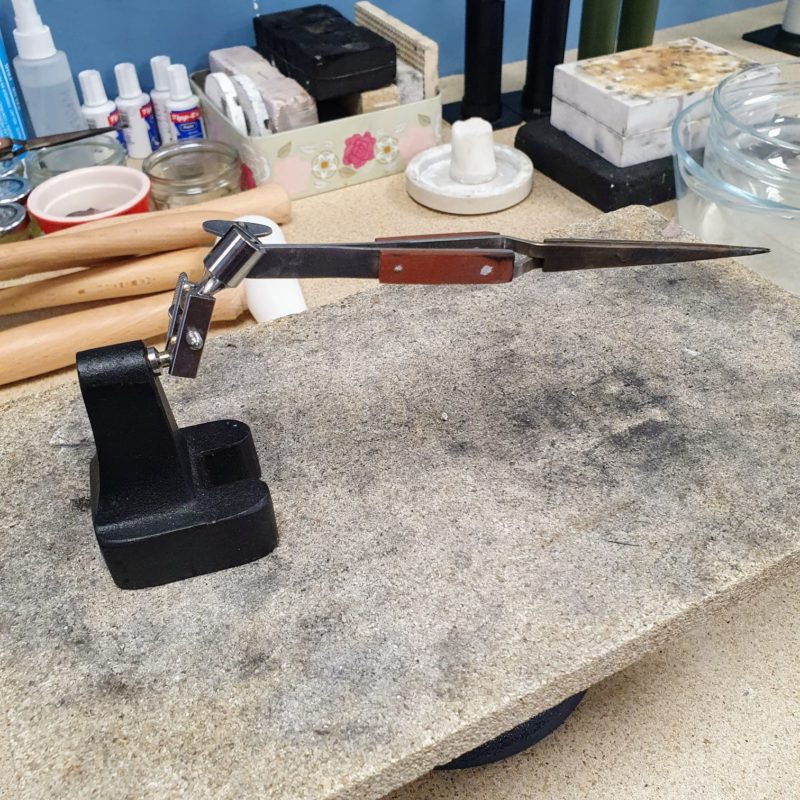
Reverse Action Tweezers and Third Hand Base
Reverse action tweezers are a great tool to assist you with your soldering. They can help you hold pieces in place during soldering which frees your hands to hold the torch and move solder into place.
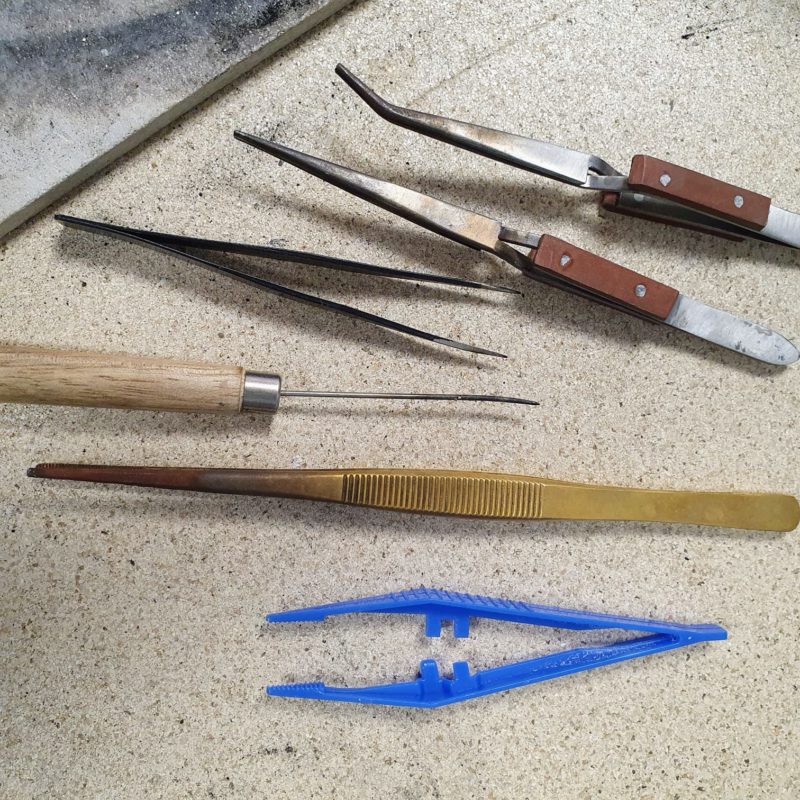
Brass/Plastic Tweezers
Steel reacts with the pickle solution which is used to remove the oxide and flux reside from your soldered silver. The steel actually ends up copper plating your silver if you put it in the pot too many times. Therefore you will need to use brass or plastic tweezers for getting your work in and out the pickle pot to keep your pickle contaminant free. Make sure they are long enough tweezers to get your pieces in and out without your hands ending up near the solution.
A little tip here – if a drill bit ever snaps off within your silver, you can actually pop it in a little bit of pickle (in a separate pot so it doesn’t contaminate a whole batch) and the steel drill bit will react and dissolve out of your work, this saves you having to dig it out. You can then re drill with a fresh sharp drill bit.
Pickle Pot (crock pot) and Pickle powder:
Your pickle removes flux residues and copper oxide build up on your metal surface after soldering. Your silver will turn a bright white colour once clean in the pickle solution after soldering where you can then rinse it in a bowl of water (some add a little baking power to their bowl of water to neutralise any pickle solution, however we find no need, water is enough to wash off any excess). You can then take your work to your bench to continue working on it or begin the polishing process.
You need to keep your pickle solution warm (around 30-80 degrees centigrade, 50 degrees centigrade is about perfect), you can use it cold, but it takes a lot longer to work effectively.
We use Vitex pickling powder at Workshop 925. With each class we rely on the solution to perform quickly so students can get their work clean after soldering at a quicker rate, therefore we heat our pickle solution and use Vitex Pickling Powder versus an organic solution such as Picklean, citric acids and vinegar (you can find these alternative recipes online, they are more environmentally friendly)
The Vitex solution has a Sodium Bisulphate base which is a type of acidic salt. It is soluble in water therefore you mix the powder with water to create your solution. Follow the label instructions as to how much powder to add to your water, generally you use 1 litre water and add 50 grams of pickle powder, halve this if you want to mix up a smaller amount. Some people use de-mineralised water however we have always just used tap water and found no issues whatsoever. However our water is not iron rich, if it is, your metal can become coated with the copper absorbed into your solution.
How much pickle solution you add isn’t strict, you can add slightly more powder for a stronger solution, or less, you won’t have any issues is you do not measure exactly 50 grams.
Add the dry acid powder to the water
When you add acid to water, it releases heat. Adding the acid to water means you are slowly adding the acid to a body of water so it dilutes down into the water and reduces the risk of a sudden hot reaction. Adding water to acid means the solution can react and splash violently and splatter as soon as you add the water to it giving you poor control over the mixture.
A Uni tutor once told me an analogy to think of when preparing pickle solution. Imagine sharks are your pickle powder and you are mixing your pickle in a huge pool. Add the sharks (pickle powder) into your water in your pool and they will swim around happily. Drop them into the pool first and fill with water after and you will have a lot of angry sharks flapping around in the shallow water as it takes time to fill up.
Vitex powder can irritate the skin and if it comes into contact with your clothes, it can make a small hole in the fibres. It can’t however eat a hole in your skin.
The pickle solution acts like an absorbent sponge sucking up the copper oxides from soldered metal. Once it has absorbed all it can, it stops becoming as effective and turns a blue/green colour. Generally, we add more water and Vitex powder rather than do a full solution change, unless it is all looking dirty, we just simply top it up. Using the crock pots, you do loose some liquid through evaporation as the lid has gaps and isn’t airtight, so top ups are easy.
If you do want to do a full change, to dispose of the old solution, you can pop it in a container and take it to the local tip to be disposed of through their hazardous waste section. We prefer to do this than pour anything down the sink or outside in a weeded garden area, as it is an acidic salt which could potentially harm animals and place chemicals in the water system and it also contains a large amount of copper particles. Other jewellers use baking soda and pour it into their old pickle solution to neutralise it then they then dispose of it outside.
We do not have separate pickle pots for copper, silver, or brass which is what we generally use for our projects at Workshop 925. Some claim you can’t pickle copper in the same pot as silver, to us this is nonsense, we have never encountered issues.
Ceramic crock pots are the perfect solution to keep your solution warm. They come in a range of sizes and are affordable. Any metal around the lid or lid handle will begin to corrode away. Also the metal in the lid is quite often made from steel, the water from the solution can cause condensation and fall back down into the main solution taking steel contaminant with it, therefore it can become a problem. Some jewellers make their own plastic lids, others paint varnish over the metal lid, and as Krista suggests below, you can cover the lid in a plastic bag.
We have recently had a brand of crock pot where the ceramic has cracked and the pickle solution has leaked out. We have never seen this before and we think it is due to this brand becoming too hot, even on a warm setting. Therefore keep any eye on your crockpot, it’s always a good habit with your tools and work area to keep an eye out for hazards or problems and make sure everything is working properly.
You can buy official pickle pot machines from jewellery suppliers, however these are quite expensive. They do have the benefit that they are designed with pickle solution in mind, therefore have the ideal heat levels set for this use, they are also made from plastic which is acid proof so no risk of steel lid contamination. However a small unit can cost over £100.
Anything you use to mix and measure your pickle solutions must be kept away from food prep. Buy a separate set for your jewellery making. Food and jewellery chemicals should never ever mix
Solder
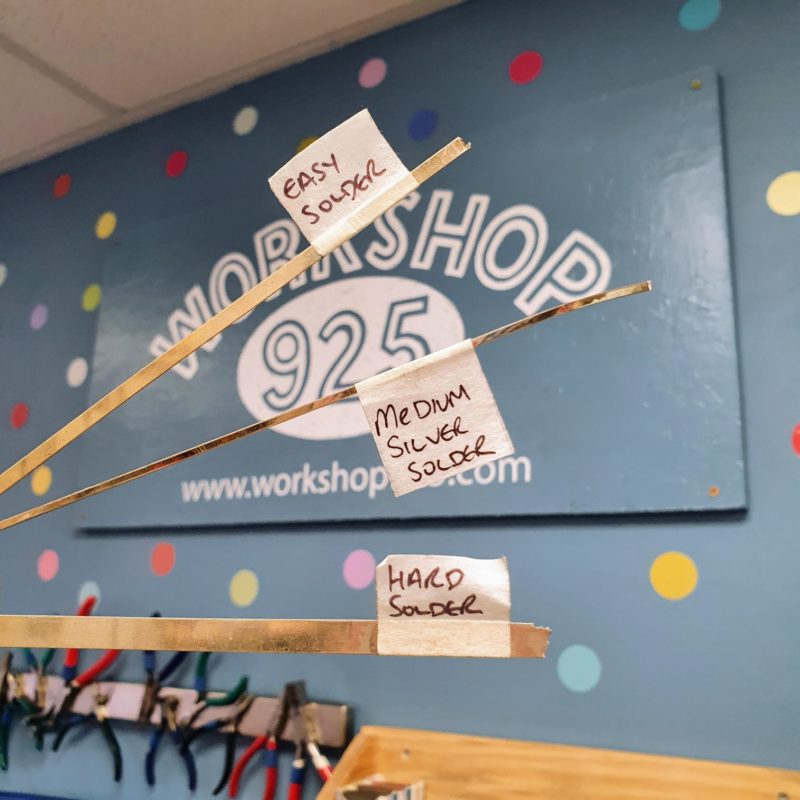
There are a range of different solders. You can purchase Copper, Bronze and Brass solder if working with these metals, silver solders and gold solders etc.
We use silver solder mostly at the workshop, these solders come in a variety of different forms such as extra easy solder, easy solder, medium solder and hard solder. Hard solder has a greater amount of silver within it versus alloy so we tend to use this as much as possible so we have a greater quality of solder on our work. The downside of hard solder is it takes a longer amount of heating time for it to run, therefore, when working with really delicate pieces, some jewellers will turn to easy solder as the solder runs more quickly before risk of melting comes into play. Easy solder will run at a lower temperature compared to harder solders. Solder also comes in paste form. This is definitely a marmite product. You either love solder paste, or loathe it. Personally I find it doesn’t flow nicely and I never use it.
Flux
Solder and flux go hand in hand. Flux cleans your metal and helps your solder flow. Without flux, your solder will sit stubbornly on your metal and it won’t flow nicely, if at all.
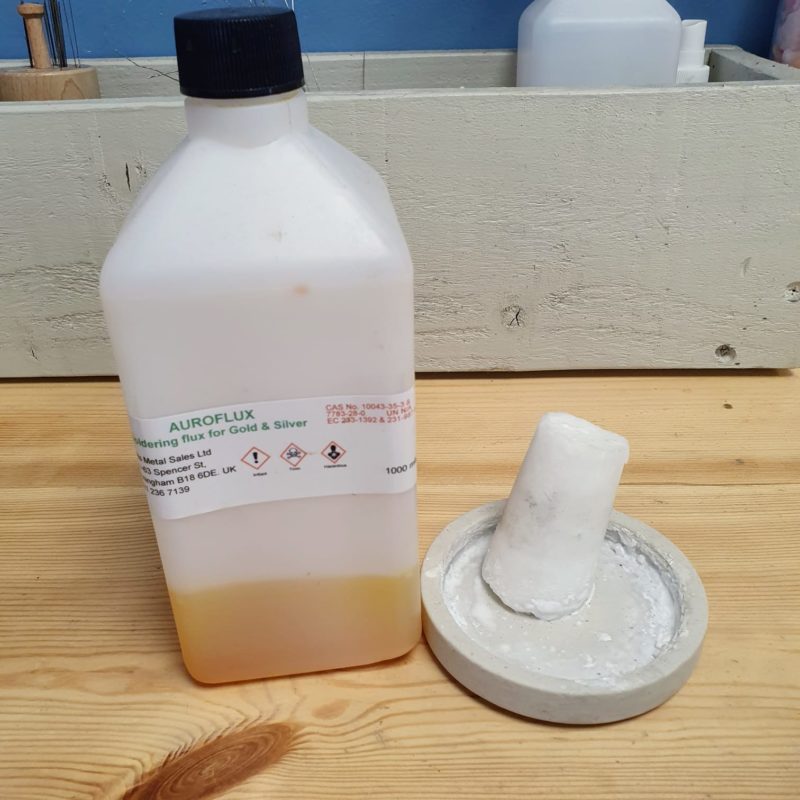
There are a range of flux solutions to choose from. When starting out I used borax cones and more often than not I now tend to use Auroflux (the bright yellow liquid flux), its quick to paint on rather than having to grind down borax. This is preference though, try a few as you are experimenting to see what works for you.
We buy big bottles of Auroflux and store small amounts in tiny jars to stop it from evaporating in between use.
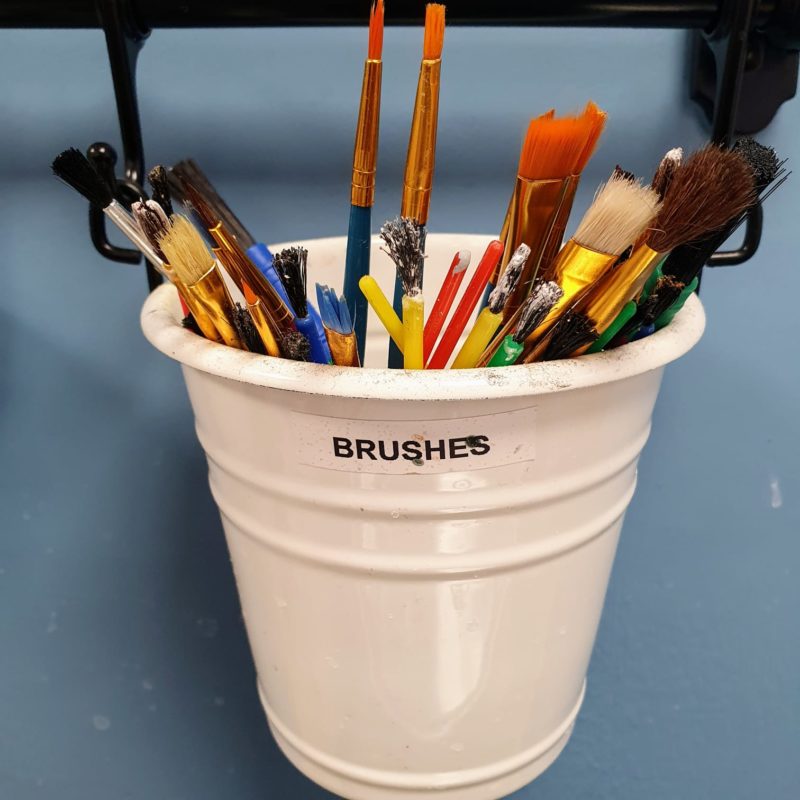
Brushes
You will need brushes to apply you flux to your work for soldering. We use cheap kids art brushes.
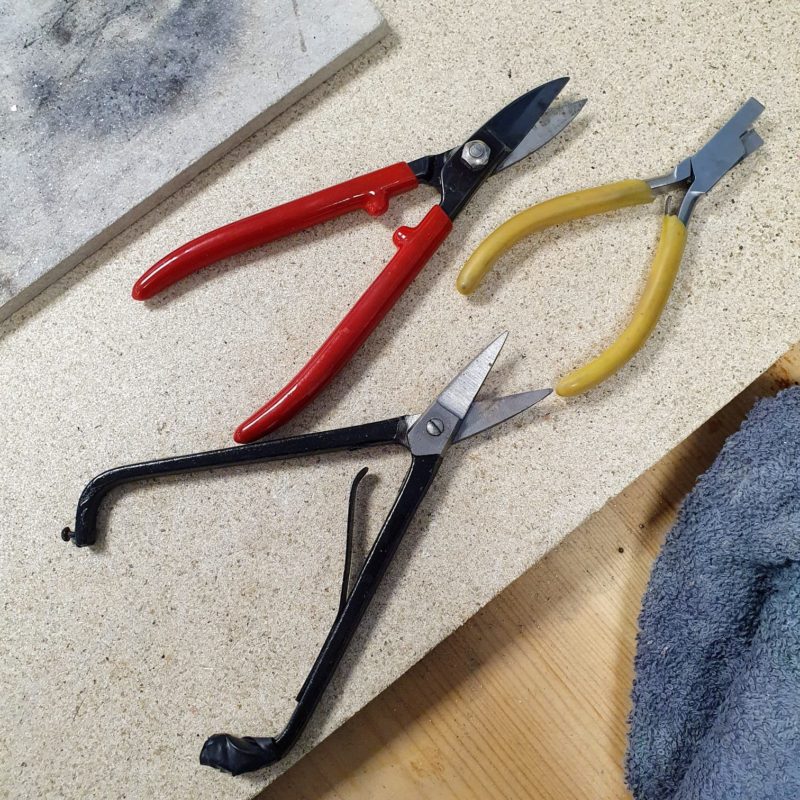
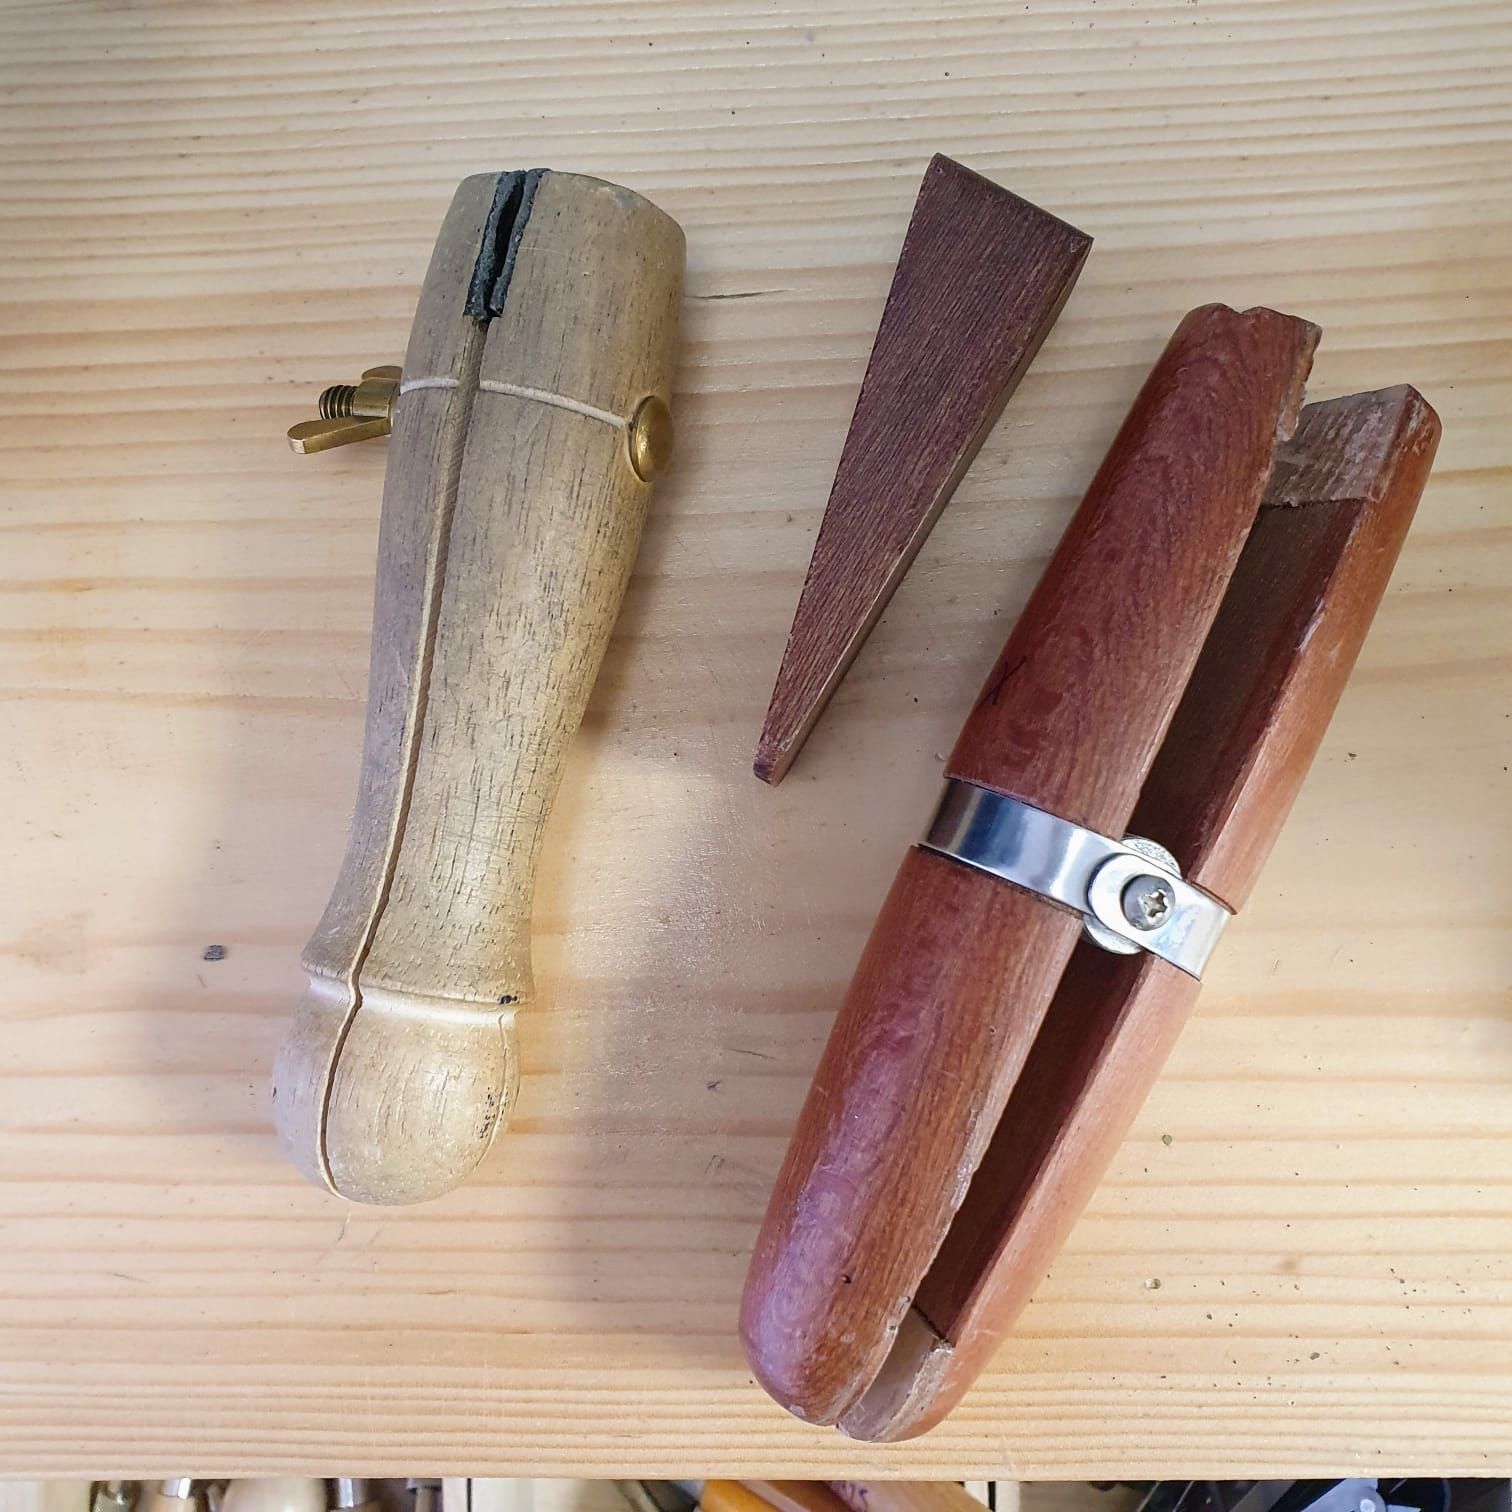
Solder Cutters and Snips
You will also need something to cut your solder into little pieces (pallions). You can purchase solder cutters which are the yellow tool pictured right. Or you can use a sharp set of snips to cut your pieces of solder.
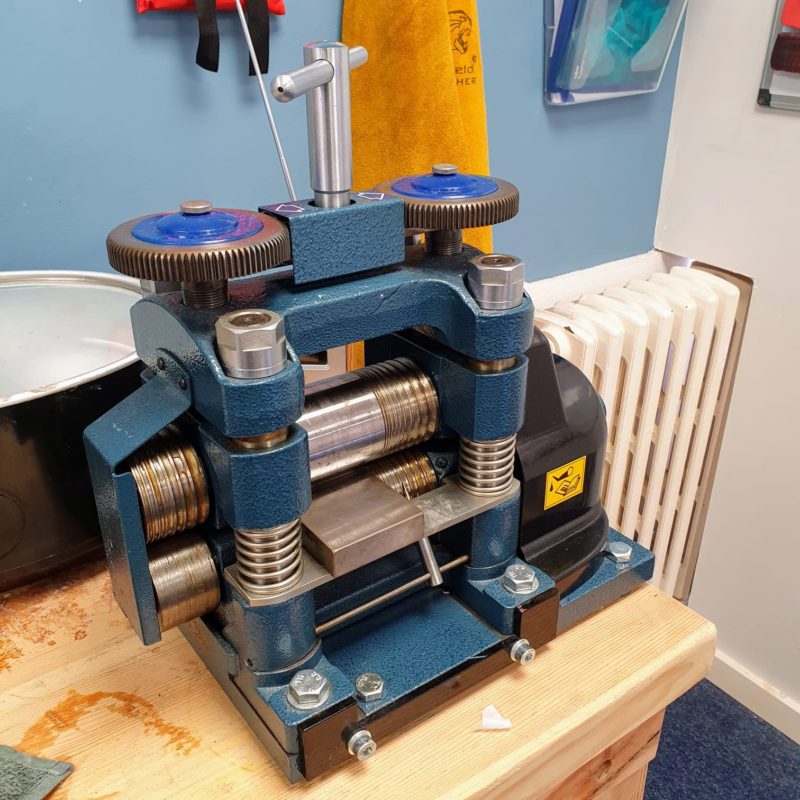
If you are lucky enough to own a rolling mill, you can roll the solder to thin it and cut it easily, even with scissors.
We have a large rolling mill, but I still prefer to use cutters.
Heat Insulating Paste
Heat pastes are always handy to have around. We have Technoflux at Workshop 925, but there are many other brands. The paste is used to protect previous soldering joins from re-running when you are working on a new join. Some pastes can also protect some stones from heat damage when soldering.
I love having the paste to hand when soldering, it means I very rarely use easy solders which are a lower quality on my work. I tend to use hard solder for everything, and use heat paste to protect areas which give concern.
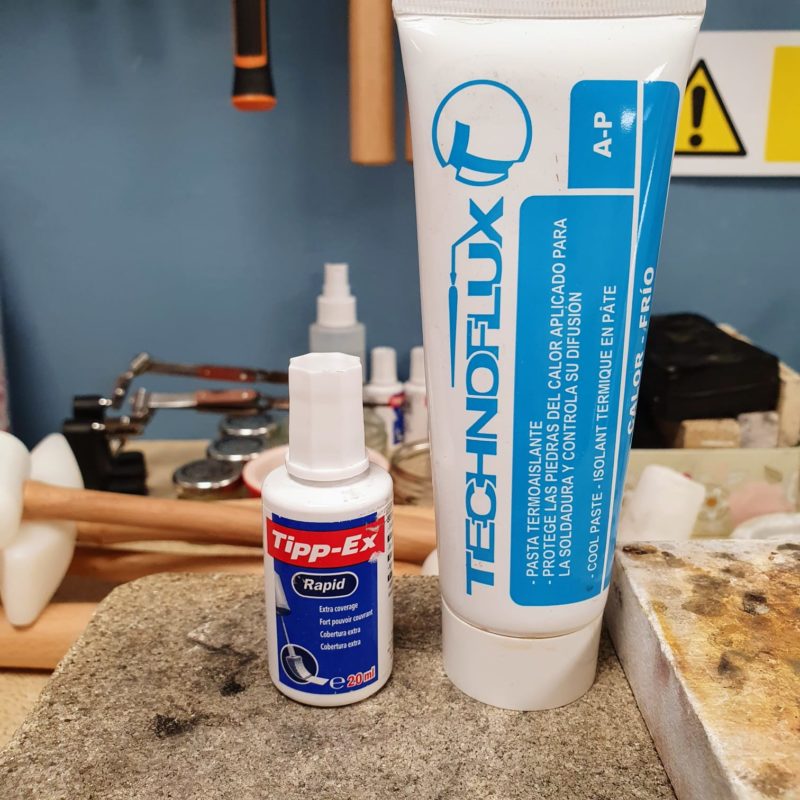
Tippex
We also use Tippex in the workshop for this and it is fantastic for protecting textured areas from solder running into it during soldering. It provides a great barrier. It is also really neat to apply with the small pointed sponge tip. Make sure you work in a ventilated area when using this, it was release quite a smell when heated. Have I yelled well ventilated area enough yet?! Haha!
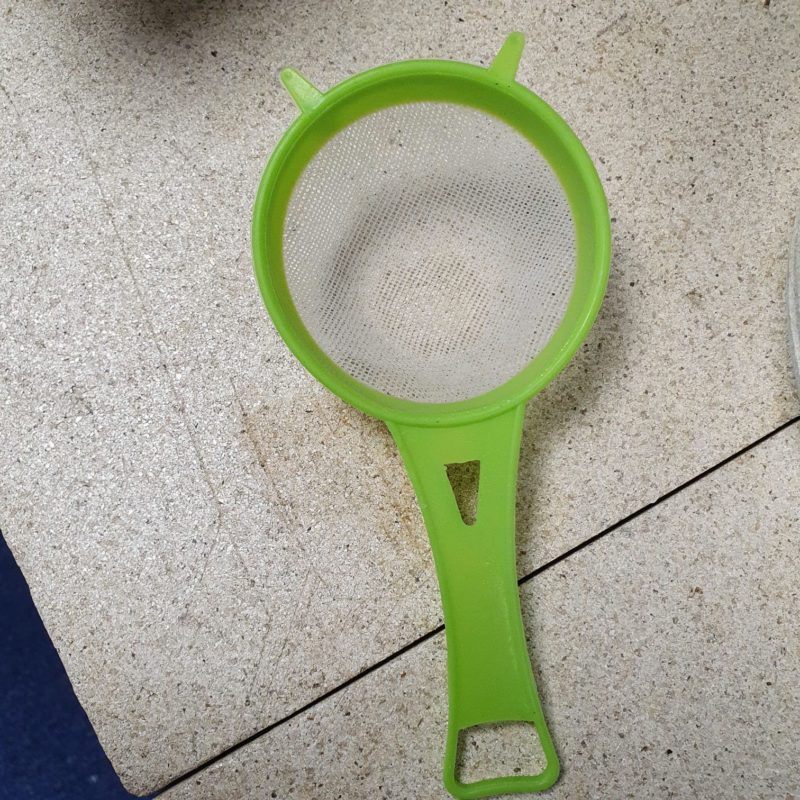
Plastic Sieve
This inexpensive workshop addition is great for many things. One thing it is great for is changing your barrel tumbler solution, it will stop any shot disappearing down your sink. I am pretty sure there is half a kilo down our sink at home stuck in a u bend.
The another benefit is that it can be floated in your pickle solution so you can place your smaller pieces within it to save you the arduous task for trying to find them at the bottom of your pickle pot. Things like granulation balls can go in here and be easily retrieved.
These sieves come in many different sizes.
Remember to quench your soldered work in water before you drop it into your sieve into the pickle solution, or you will end up with a melted hole in your sieve.
Lets not go into the quench or not to quench after soldering argument here. (I am a sterling silver quencher personally).
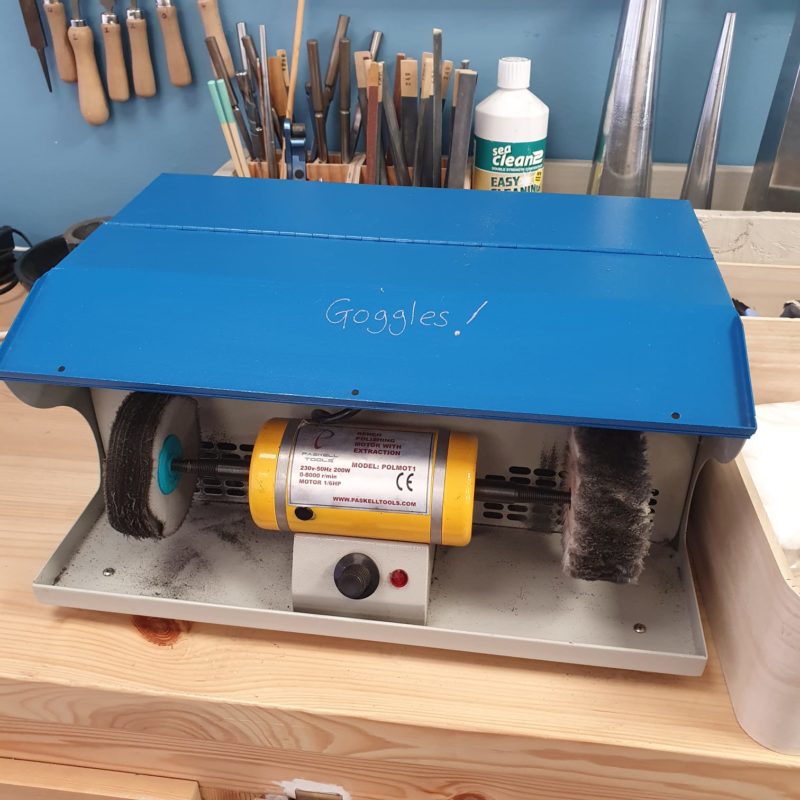
Barrel tumbler, Barrelbrite and Stainless Stainless Steel Shot
Polishing your jewellery is an absolute art form. There are some who specialise in polishing itself as it requires a high level of skill to achieve a good polish, especially if you are seeking the perfect mirror shine.
However a barrel tumbler can be a good starting point and is effective enough for many jewellers designs, therefore is a good bit of kit to use before investing in a polishing motor. Barrel tumblers have a barrel which is made of either plastic or rubber generally, which is placed on its side on rods which spin. Inside your barrel you place steel shot, this usually comes in a 1kg bag. Do not place the entire weight within your barrel as the time you put in water and your work, there is an extremely heavy amount of weight that is required to turn the barrel which places strain on your motor. We use about 500g worth in our barrels. The stainless steel shot is gently thrown against your work and burnishes the surface giving it a shine.
Barrelbrite acts as a polishing compound and also if you buy steel shot instead of stainless steel, it prevents rust build up.
Some will use the solution once and clean and dry the shot after each run, but this is not necessary. We change the solution when it has a silvery tinge to it (you will see it when it happens) We usually get anywhere between 3 to 6 runs out of one water and barrelbrite mix. We then pour out the solution making sure no shot goes down the sink (you can pour it into a sieve to avoid this) and then refill with water and Barrelbrite. You don’t need much Barrelbrite, follow the instructions on the container, too much and you end up with a thick foam and the shot becomes suspended in the foam and doesn’t polish effectively.
We use an Evans Barrel tumbler, stainless steel shot and Barrelbrite from Cookson gold. We leave designs in there for around and hour or slightly longer to achieve a good polished effect.
Please note, barrel tumblers aren’t magic machines, you still have to put in the work with your emery paper to eradicate tool makings and deep scratches. The tumbler is a last step to bring it to a shine.
Here are some other fantastic tools worth adding to your collection…
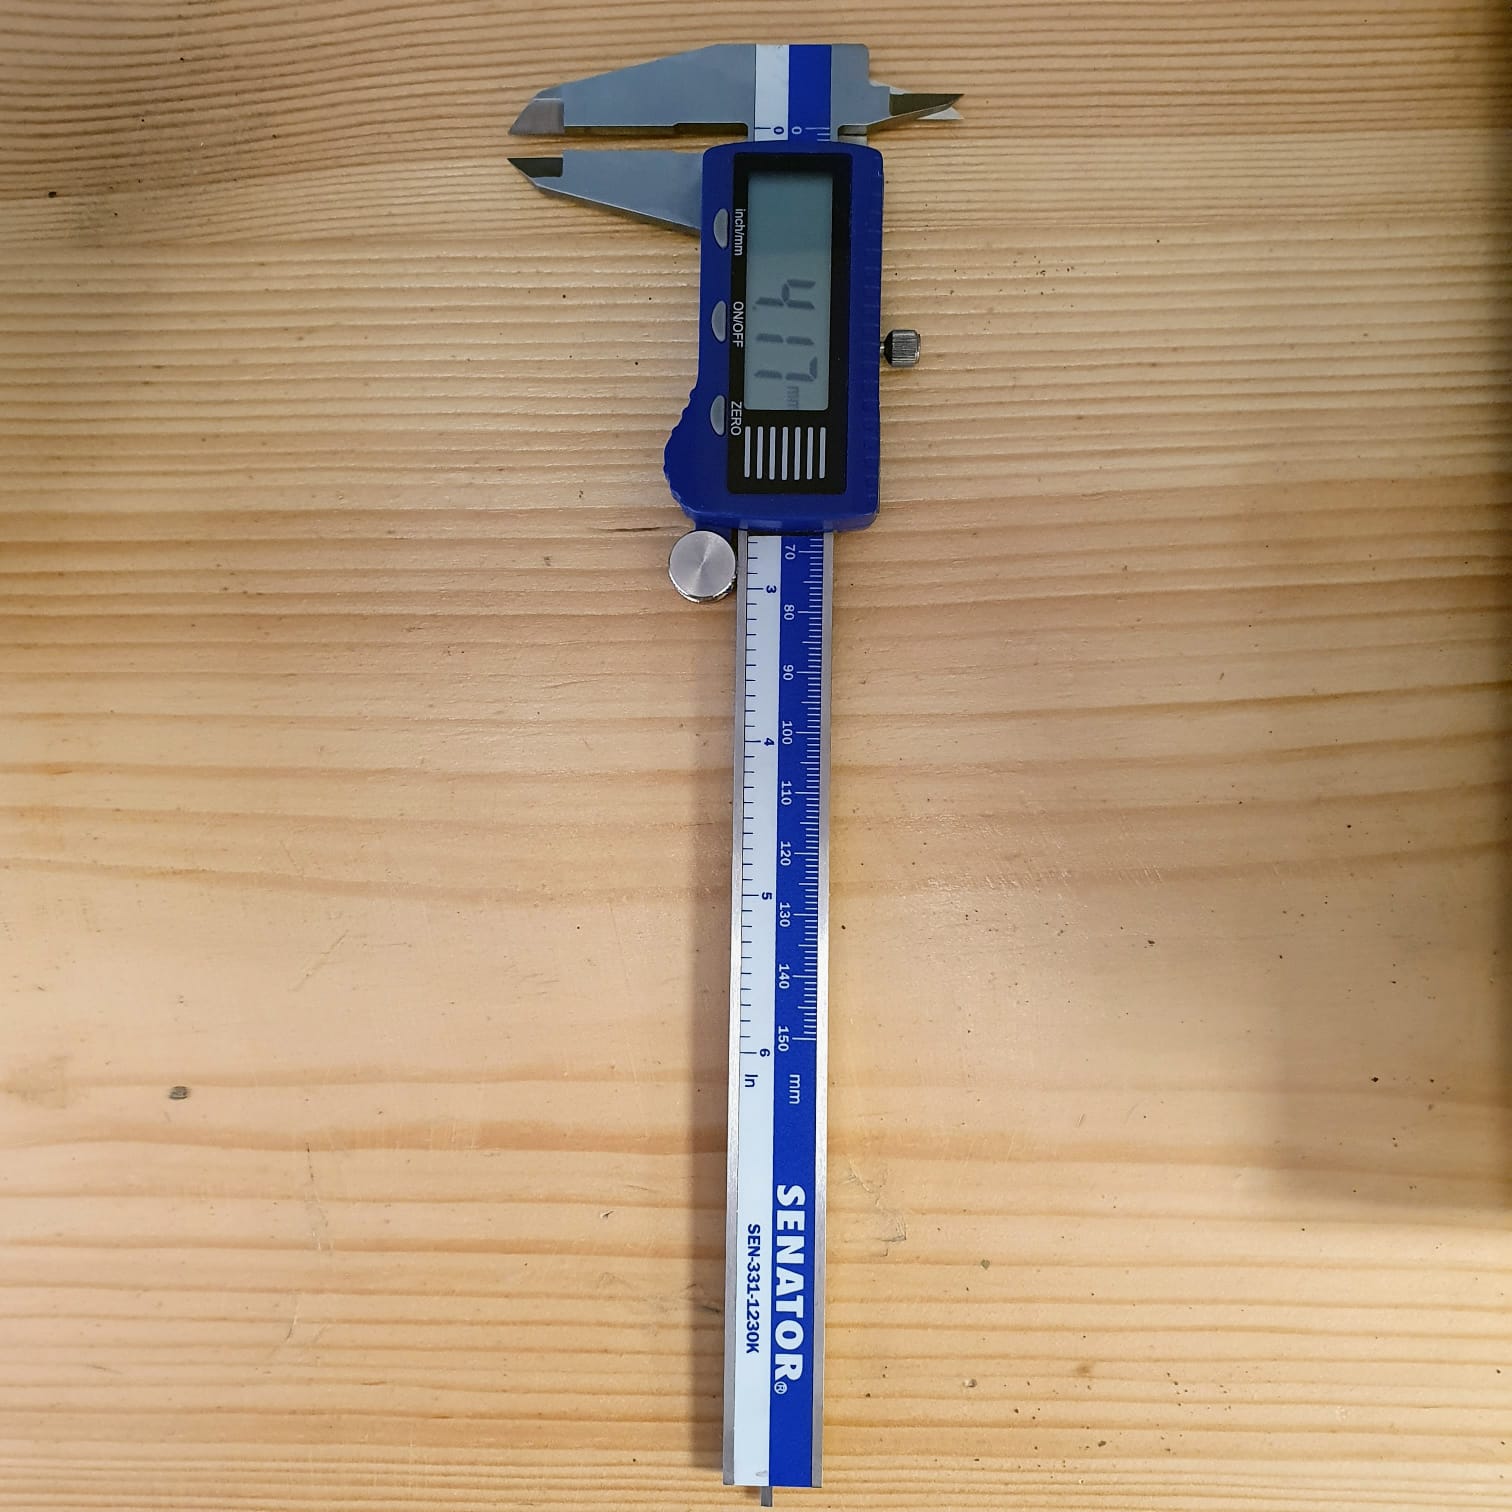
Digital Caliper
Great for measuring everything accurately from stones, metal thicknesses and lengths, spacing etc.
Ring Clamp
Great for holding your designs. This can take pressure away from your hands when holding things while working on them.
Mitre Jig
A great little tool for creating perfect flat edges and angles. These are inexpensive at around £30.

Dividers
Another handy tool for marking and measuring accurately.
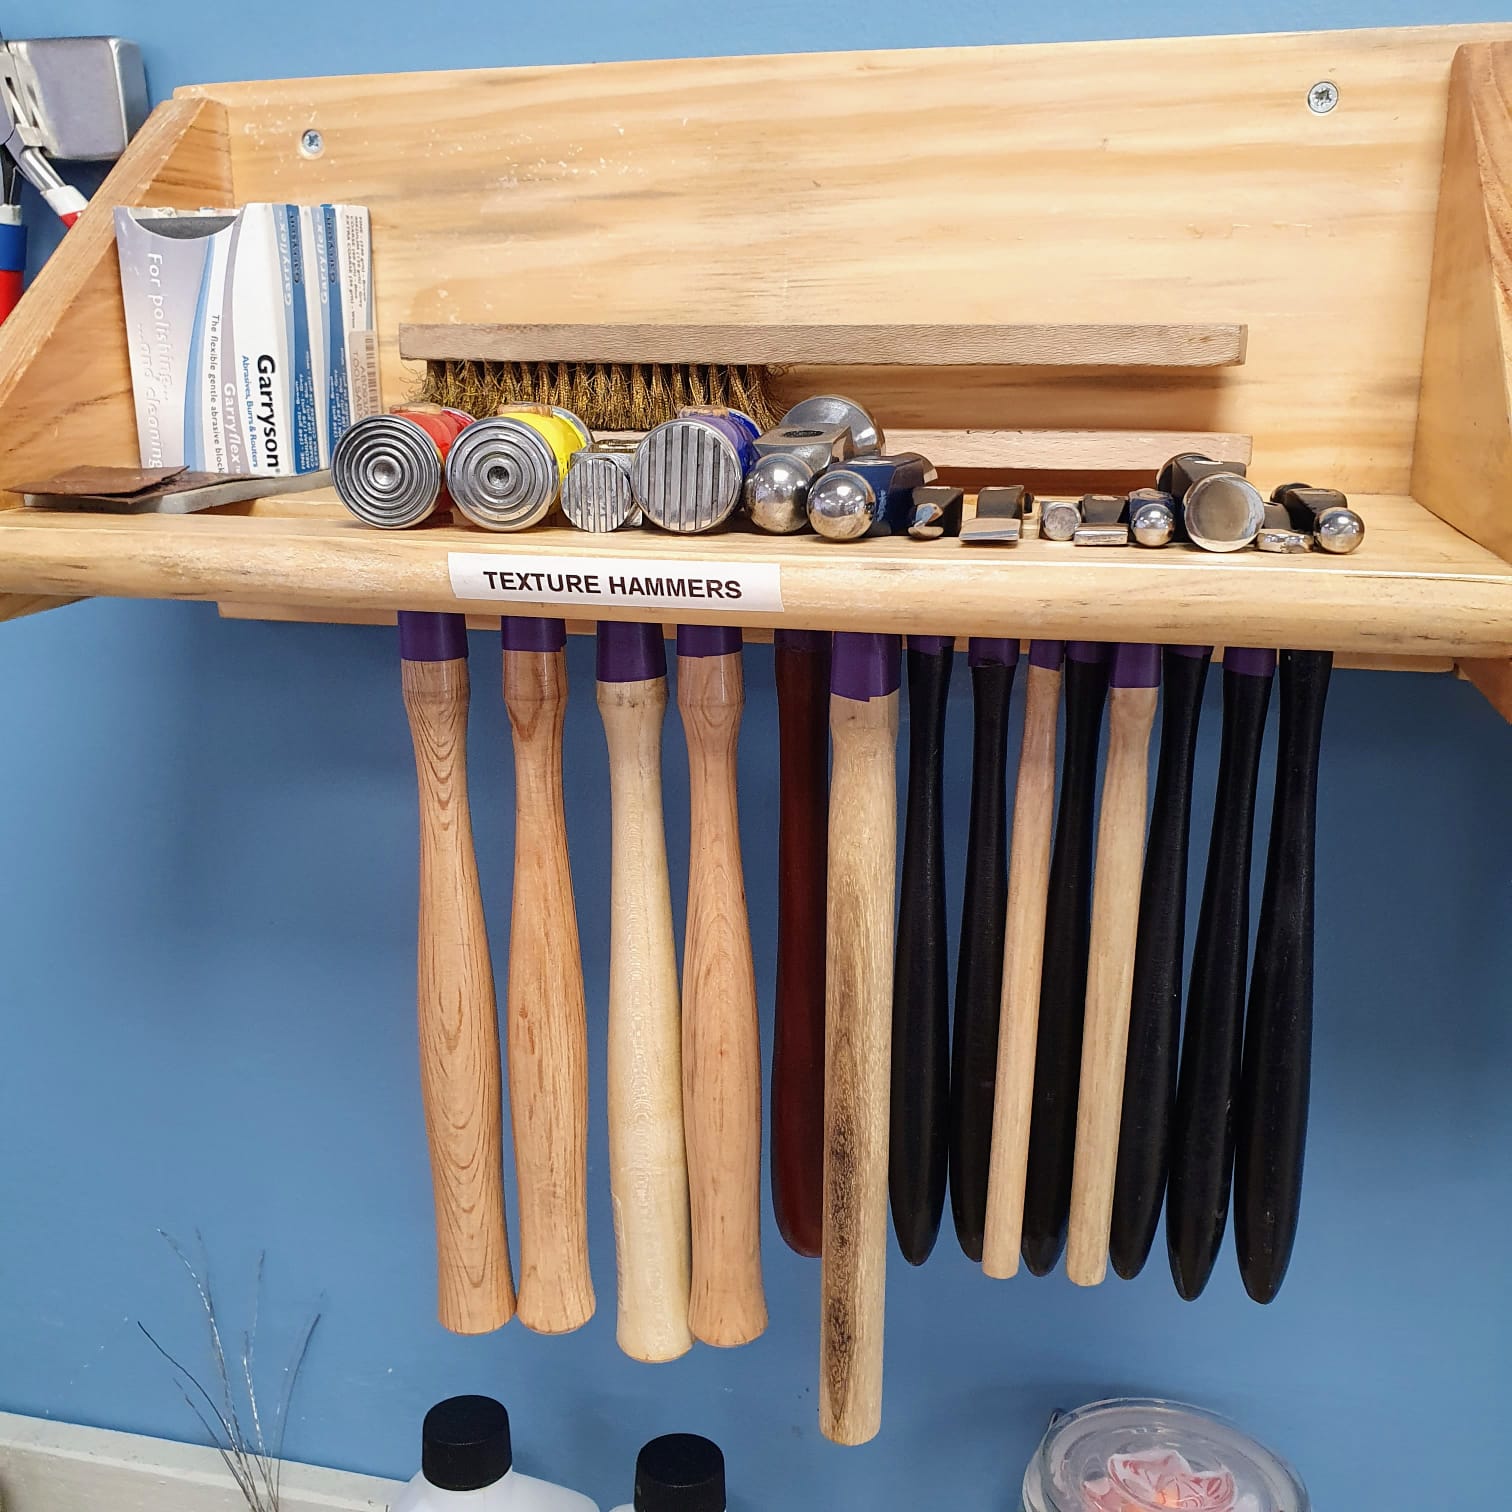
Hammers
I don’t think it is possible to own enough hammers.
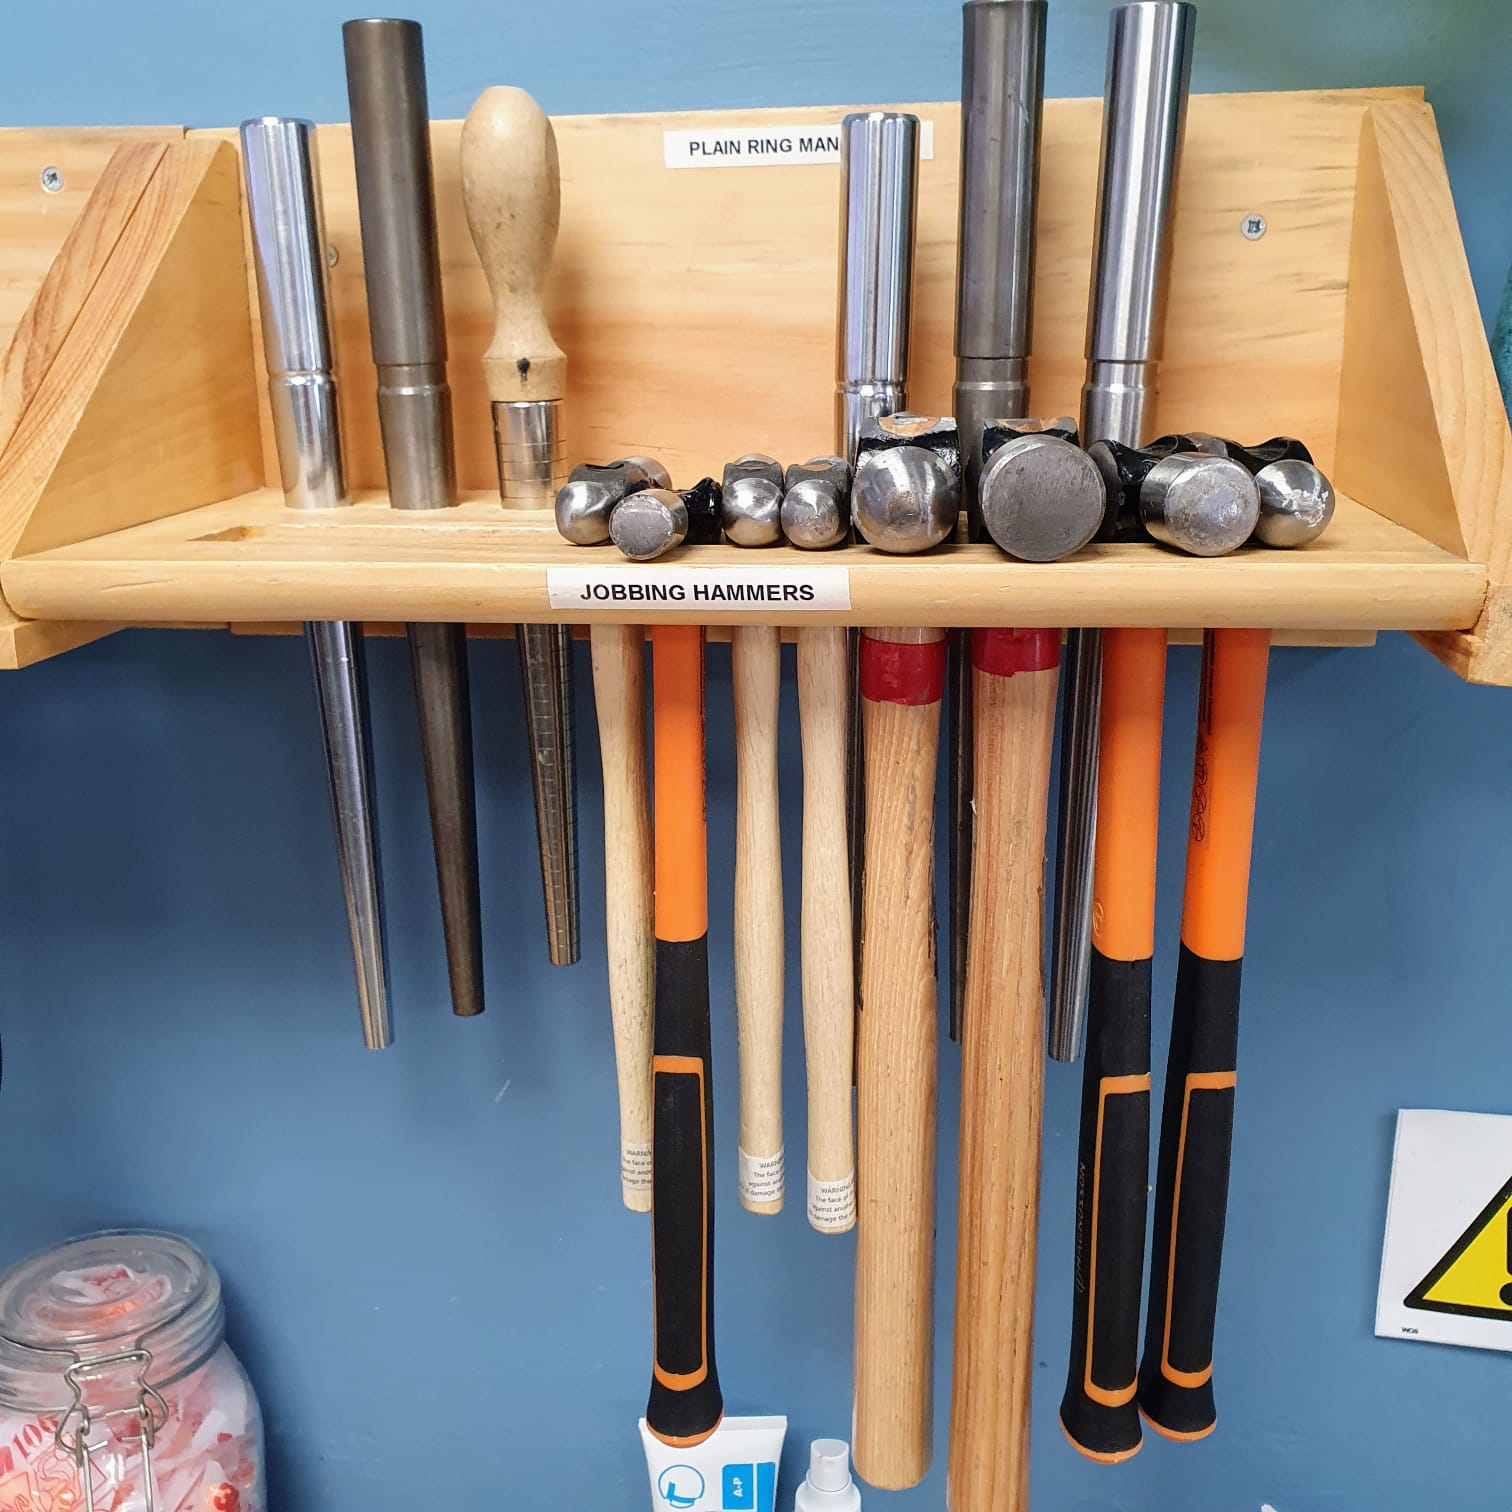
Hammers, hammers and more hammers
They are great for everything, texturing, shaping, forming, tapping things into place, go get yourself a collection of hammers of all shapes and sizes.
Bigger Investments:
When you go beyond your basic tool kit as you progress, you might find yourself specialising in certain areas. If you like the route of stone setting, you might find investing in good setting tools is a worthy investment.
My biggest tip is to have lots of fun experimenting when starting out, but don’t go out and spend hundreds of pounds on one area of jewellery making, wait until you are sure you will need the equipment and it will be worth the cost.
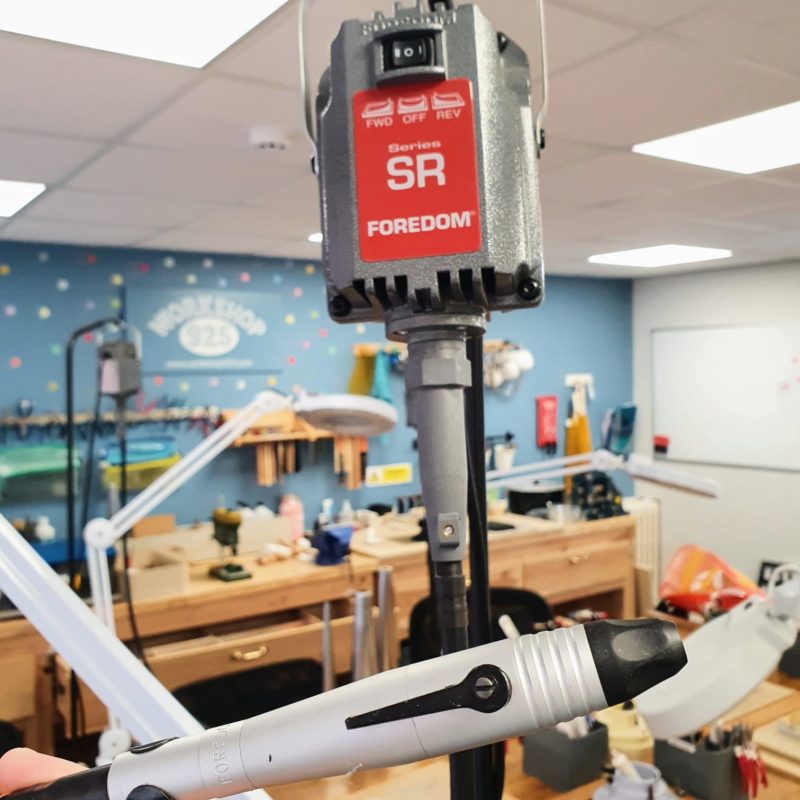
Some of my best investments in equipment are my Foredom Pendant Motor, polishing motor, rolling mill and Emir workbench.
A pendant motor is a great ally to have. It can be used for drilling, stone setting, polishing, texturing, filing and shaping your metal. There are fake versions, but beware, they can overheat and do not compare to the original models.
Health and Safety
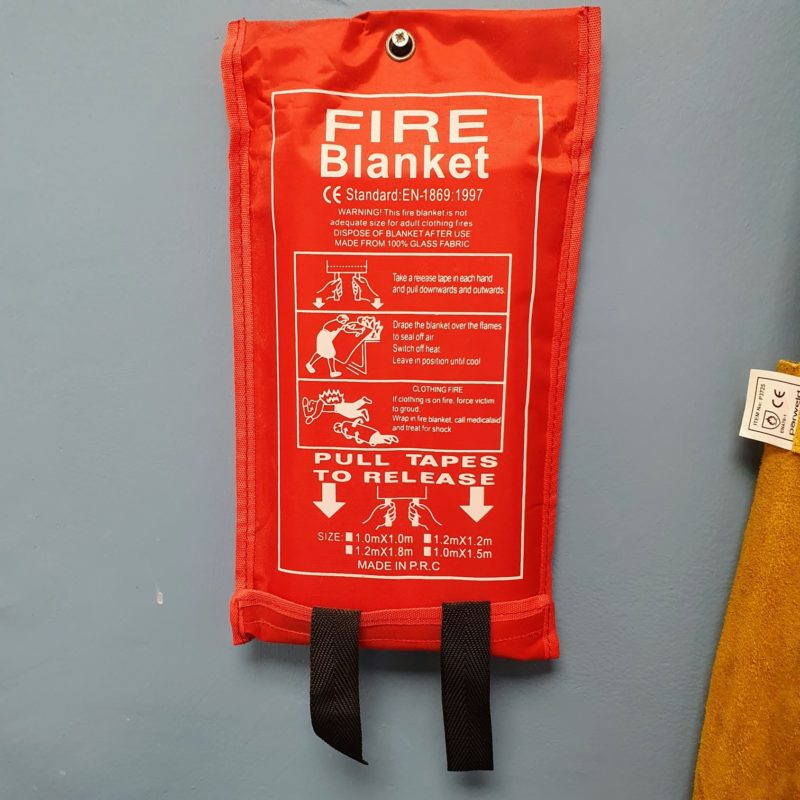
Make sure when you are buying all these lovely new tools, that you give a little thought to your safety. A fire blanket and or extinguisher is really important to have to hand and also generally a good asset for any home.
Also a first aid kit can be handy for any small injuries you might sustain – piercing saw cuts (don’t worry they aren’t that bad), small burns etc. Having something easy to hand in your workspace is a must.
Suppliers:
Cookson Gold is the main supplier students and professionals turn to. The main bonus is their excellent customer service and very fast ability to process and deliver orders. Their website is quite easy to navigate too, though the search bar isn’t always your friend.
However, if you aren’t in a big hurry for your silver or tools, it is worth shopping around to see if you can find some other deals. Argex, Betts Metals, Palmers Metals, H S Walsh, Cousins, Proops, Rashbel, Kenocraft, Tools n Tools etc are just a few on the suppliers which might provide you with a better deal. I also have a hunt on eBay sometimes for soldering tweezers and other smaller tools that work out a little cheaper here, though remember… be aware of poor quality tools, quite often ‘buy cheap, buy twice’ comes into play when you head into the cheap tool market.
I have also sometimes search dentistry tool websites, dentistry and jewellery are quite similar trades, we use many of the same tools, and sometimes you can find some great dentistry tools for your jewellery making needs.
Here are just a few suppliers we use for silver and tools, listed in no particular order:
- Bellore Rashbel
- Betts Metal Sales (Previously Sutton Tools)
- Cookson Gold- Reliable and quick to ship. Their customer service is good too.
- HS Walsh- A great supplier to purchase from, very helpful!!
- Kernowcraft
- Manchester Minerals Ltd
- Argex
- Tools N Tools UK
- Eternal Tools
- Albion Fire and Ice
- Tuffnell Glass
- Damson Silver
- Samuel Findings
- Black Arts Casting
- Euro Mounts and Findings
- Cousins – I have to be honest here, it’s so hard to recommend cousins, one part of me likes some of the tools and burrs they offer, but their customer service is completely hands off, they sell you a product, but you won’t get any further support, if something goes wrong, they couldn’t care less.
- Proops Brothers Ltd.
- El Silver Supplies
- Axminster Tools
- Palmers Metals
I asked our Workshop 925 tutors and students for their tool top tips and firm favourites…
Amy Hubbard – Workshop 925 Tutor and Goldsmith
What is your number one favourite tool and why?
My ring mandrel, as it was a birthday present from mum and dad. They thought it was a pretty odd thing to ask for, but it’s a tool I use everyday at work and I will never ever need another one! It’s a must have tool for a goldsmith!
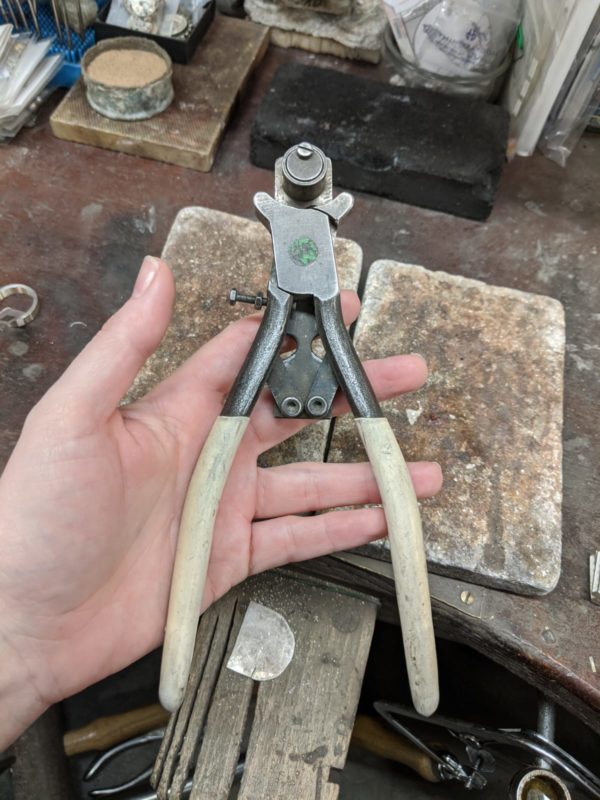
Also these ring bending pliers are a godsend for me, as sometimes my hands, wrists and shoulders are a bit rubbish so these help if I am making particularly chunky rings or needing to bend a huge lump of metal in general, these give you a good start. Find tools to help you if you lack some brute strength!
For someone starting out, what tools would you say benefitted you initially?
I benefitted from a ring mandrel, decent saw frame, a few files of differing grades, a basic set of pliers and a clamp on benchpeg to work at the kitchen table.
If you were to start out again, what would you do differently in terms of the tools you have purchased?
If I started out again, I would invest in a decent solid bench. I bought a collapsible one when I started and all it did was collapse! 😂
Have you adapted any of your own tools to make them better for workshop use?
I have adapted these pliers: a groove to hold wire etc, and also made them slightly half round in profile.
Krista Thomson – Workshop 925 Tutor and Jeweller and Silversmith
What is your number one favourite tool and why?
No 1 fav tool is a toss-up between my piercing saw and my xeuron cutters. But I suppose the piercing saw wins as I’ve had the same on since I started out and piercing designs is probably my favourite activity. I love a good technical graphic design to pierce. Piercing the coastline of Pembrokeshire and making it into the sleeve of a circular tube was one of the most challenging- Milford Haven was a complete bugger.
Other favourite tools as a girl that specialises in texture is my rolling mill, my steel block, hammers and stamps
For someone starting out, what tools would you say benefitted you initially?
When starting out, before I started soldering at home, these tools were really versatile: pliers – double flats, 1/2 round, double round, snipe nosed and parallel, plus shears / snips!
If you were to start out again, what would you do differently in terms of the tools you have purchased?
If I was starting out again, I’d make sure I bought the best tools I could afford or wait and save up – cheap tools are a false economy!
Have you adapted any of your own tools to make them better for workshop use?
A tool I have adapted is my disc cutter. If you take out the centre spacer (which if the metal isn’t held down properly give you a double cut), you can use an allen key to clamp the silver in the cutter and then punch perfect discs.
Also I place a plastic bag around the lid of the pickle slow cooker, it ensures that the condensation coming off the steel screw doesn’t contaminate your pickle.

Stephen Barnett – Workshop 925 Tutor and CAD and Stone Setting Wizard
What is your number one favourite tool and why?
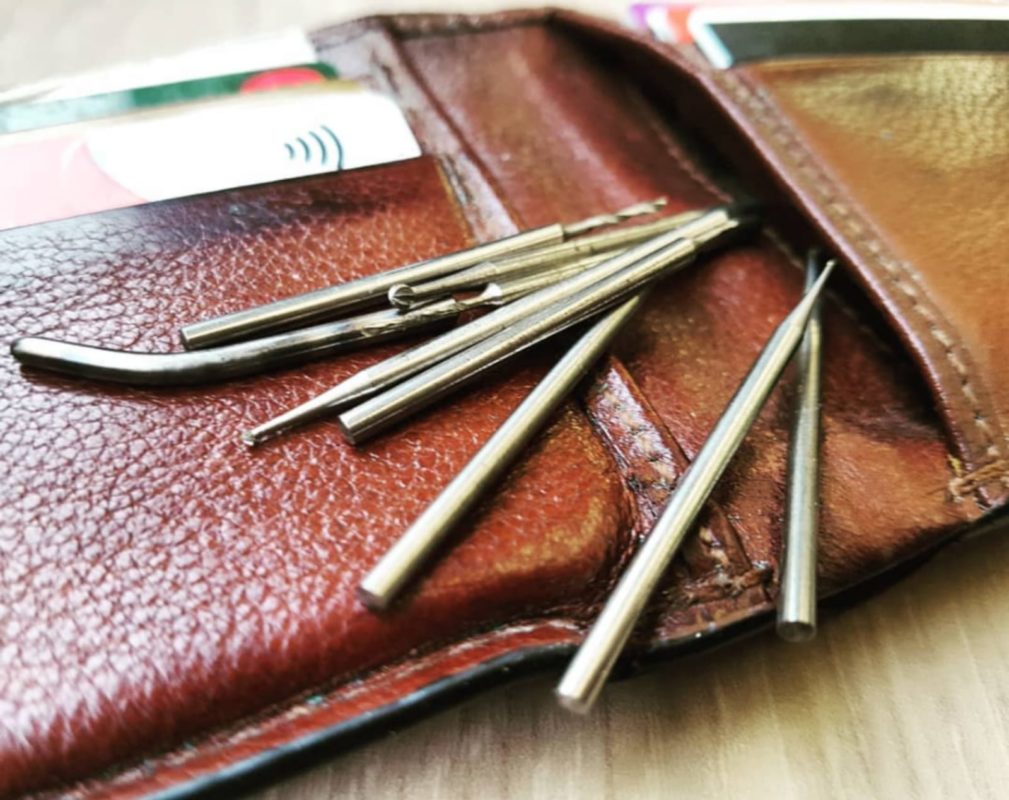
I do love me some parallel pliers I feel a bit lost without them. I’ve just always found them an incredibly versatile and useful, great for both holding and manipulating the metal. That said my top three desert island tools 🌴 would be a pair of parallel pliers a set of emery paper sticks and the small selection of setting burrs I keep in my wallet in case of emergencies. (You never know when a 1mm bearing cutting might come in handy)
For someone starting out, what tools would you say benefitted you initially?
Sanding sticks, the single most important tool a jeweller can have is a good set of sanding sticks and the good news is they cost practically nothing you just need some round and some rectangular doweling. Some 600 and 1200 emery paper and elastic bands. (Always elastic bands so you can swap the paper over faster.) I’d say as a commercial jeweller I use my paper sticks 80% of my working life. And when I was at University they never even told me about them.
If you were to start out again, what would you do differently in terms of the tools you have purchased?
On my first day of work I turned up with some electrical pliers and my new boss laughed so he nearly wet himself. (Maybe that’s why I’m so keen on my parallel pliers now) I think the main piece of advice I’d give anyone is spend money on good tools. A good craftsman doesn’t blame his tools because they care enough to invest in good tools on the first place.
Have you adapted any of your own tools to make them better for workshop use?
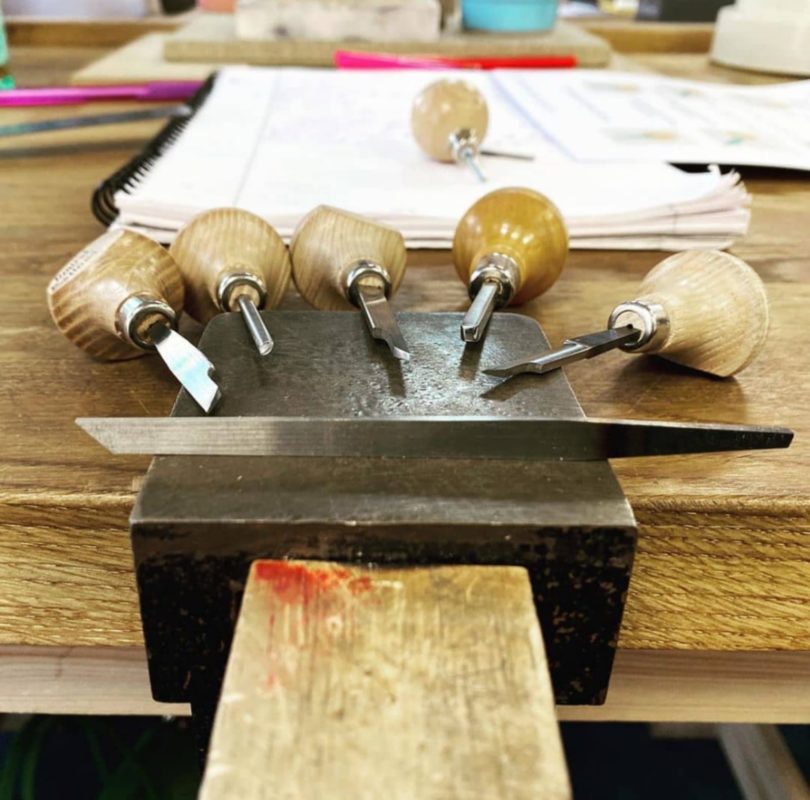
As a setter you tend to both make a lot of your own tools and adapt tools for the job and we do a have one day tools making class at workshop 925 where I demonstrate making these tools. Also in my time at West Dean collage studying restoration we used to be encouraged to make all sorts of tools as this is what the craftsmen who made the items we were working on would have done. I think that set me up with a great mentality of if you don’t have the correct tool just make it.
Purdy Grewal – AKA Vidya Jewellery
What is your number one favourite tool and why?
My firm favourite is the Mitre Jig.
I also love my good old Foredom, my doming set, needle file sets and a solid set of Tronex cutters
If you were to start out again, what would you do differently in terms of the tools you have purchased?
Personally for me, short cuts with cheaper tools ended up being false economy for me, i.e the plier/cutter sets along with a few other items where I really wished I had the patience and saved up to buy the better quality tool, all part of the learning curve.
Silversmithing is really my “zen” time as I quickly become immersed in my project. Always learning along the way.
Lesley Shatwell – Workshop 925 Student and Fold Forming Lover
What is your number one favourite tool and why?
I found it hard to believe that on my first class, I was allowed to solder a piece of copper into a ring. I couldn’t even light the torch, I was such a complete beginner, but here were Amy (yes, Workshop 925 Amy) and Phil my tutors (I started at West End Centre in Aldershot), with enough belief and confidence in me to let me have a go. That was January 2011 and from that moment, I was hooked. I remember asking at the end of the first term, if I were to start my own collection of tools, what should I choose first. Cut 2 half round. And I now agree. A beautiful, expensive, Swiss made file. That was the first tool I bought and it is the one I use most days still.
Well, I am lying, I didn’t buy it, my Mum did. She wanted to get me something for my birthday and was delighted to finance the purchase of the file – partly in remembrance of my Dad who had been a multi-talented craftsman had a love for tools, a love which I seem to have inherited. I get particularly annoyed if I see people using a tool badly, scrubbing away with a file or losing patience with a saw and breaking blades left right and centre. Let the tools do the job for you. There is a particular delight in watching the metal gleam as you gently work a file along the edge.
For someone starting out, what tools would you say benefitted you initially? If you were to start out again, what would you do differently in terms of the tools you have purchased?
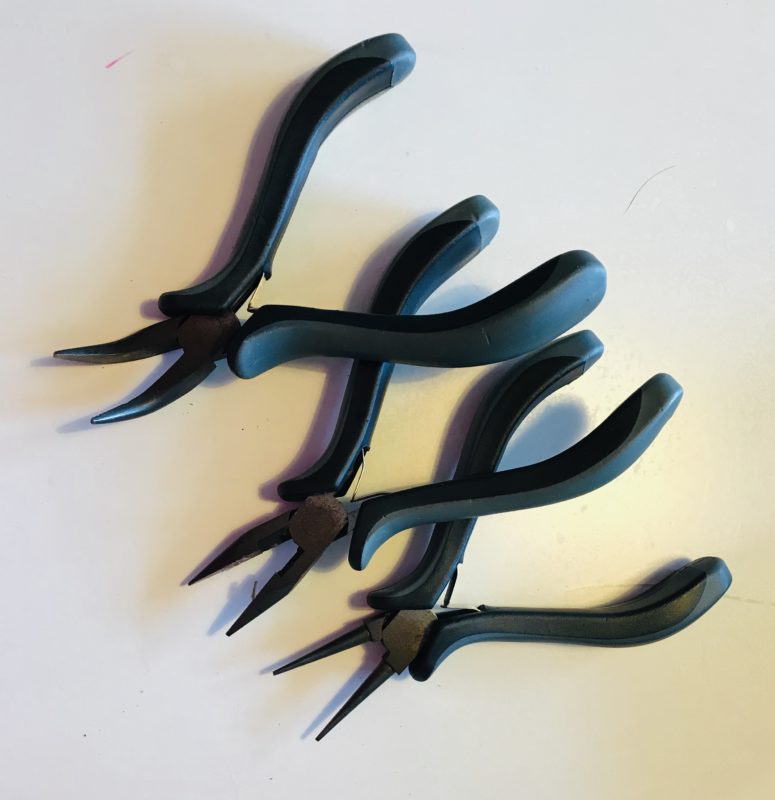
I have a collection of pliers….
They look pretty and I do use them – except for the oval ones which I only used for one project. Some of them are not very good quality and they are inclined to bend – they were a mistake and I ended up having to buy a more expensive set after all, so they were not the bargain I’d hoped for. The ones I use most are the round nose pliers – brilliant for fixing little bends in fold-forming; the snipe nose pliers (I use two to hold jump rings accurately) and the cylindrical round ones (for making bails, jump rings and fold-forming). There is often a specific tool for the specific task you want to accomplish, but if you haven’t got the exact tool, there is often one you can use instead. Tempting though it may be if you love tools, don’t rush to buy one which has limited application, wait and see whether you really need something which is that specific.
Have you adapted any of your own tools to make them better for workshop use?
I haven’t adapted any of my own tools in this way, but I do use things which aren’t necessarily jewellers’ tools. My latest “found” tool is a suede brush (meant for shoes). I was looking for a brass brush, which this one does have, although it’s not as big as I would like. But in addition, there are flexible plastic/rubbery brushes and a rubber blade-like spatula on it – excellent for getting underneath and round corners on fiddly pieces of metalwork.

Other things I find useful are plastic modelling clay tools – you can wrap emery paper round them and poke them into difficult corners. An old dinner knife, spot on for opening up fold-forms. Various wooden kebab skewers which offer a gentle point for difficult cleaning crannies. When confronted with a task and I don’t have the right tool, I look around the house to see whether there is something which I could adapt, it’s part of the fun of solving the problem.
Lesley Tooby – Children’s Tutor at Workshop 925 and Beading Master
For my beading work my favourite tools are my pliers. I’ve been using them for about 15 years, and they feel like “attachments” to my hands. When I use someone else’s pliers now it feels very strange and not at all natural. I prefer to use my bent nosed pliers rather than flat nosed pliers as they really get into small gaps when needed. There are many things that can be “tidied” with a pair of pliers.
For my silversmithing work I had to really think about what my favourite tool is, and I’ve decided that my hammer is my favourite. It can add texture in so many different ways and can be very therapeutic to use, especially at times like this! It is an easy tool to use as all I need to do is sit at my desk and hammer away. I’m starting to try textured hammers now and love experimenting to see what pattern results.
I will close by saying this…
Buying tools is confusing, they only way you find your way is to really dive right in with a spot of caution. You will definitely make dud purchases, but you will really begin to recognise good brands, you will begin to notice the difference between a good quality tool and a bad quality tool, and you will then find confidence to adapt tools to make them perfect for your own use.
A tool I might like and find key to what I do, you may find useless, a person’s toolbox is a personal as them, our projects and designs differ therefore so do the tools we need to make these projects.
There is of course the recognition of the key tools you will begin to see within every jewellers workshop, which is where we hope our starting out list helps you establish these, from there, enjoy building your own personal set of tools. A good set of tools can make you more productive, so choose your team wisely.
And finally, don’t let mistakes throw you off course, mistakes are the best way to learn and can be so valuable. Dust off the frustration and crack on, it will make you a better jeweller.
You can always email us at hello@workshop925.com to ask tool advice before purchasing.