Setting Up a Jewellery Workshop at Home
The first place to start when you want to make jewellery making a hobby or a business is to establish your workspace itself.
Building a collection of tools and equipment takes up space, some can be easily stored away, other tools take up a bit more of a permanent residence and you will find you need a designated work area. The more equipment you build up, the more space you will require. However, you can start small and work anywhere.
I have seen many set ups over the years with people creating amazing spaces under the stairs, within converted garages, spare rooms, sheds or log cabins, to those who work on the kitchen table and pack away their tools each day into a craft cupboard. You can set up a workshop pretty much anywhere within your home and with some creativity, you can find some amazing storage ideas and methods to combine home life with jewellery making.
Here are a couple of my tips for getting a workspace set up at home…
Find a suitable space to work:
You need to make sure the place you decide to work is safe, secure, ventilated and dry. You will also need a power source. If you work in a damp outbuilding, your tools can become damaged with rust, so make sure your work environment is suitable before you start putting your expensive tool collection into it. You can put in some insulation if you are working in a garage or shed space at a relatively low cost. Some of the chemicals you use such as safety pickle, barrel tumbling soaps, polishes or oxidising solutions can be dangerous. If you are working within your home, make sure they are kept out of reach of children or animals and don’t find themselves getting entwined with evening meal prep. You might want to consider a locked cupboard to avoid any accidents if you have young children.
It’s not always easy when you lack space and you have to work from the dining room table. You can find some great craft cupboards which even have tables built in which allow you to work and then close it all away as soon as you have finished. If not, you can work from your dining room table and box it away once you are finished and store it safely away, make sure chemicals can’t easily tip over or leak or mix.
Spare rooms are always the firm favourite as you do not have to pack all your work away if you haven’t quite finished your work, it can simply be shut away from children and pets. It’s also within the home, so more secure than an out building, it is also warmer and drier.
If you are doing things such as polishing, soldering, or sanding, you might want to consider your air space (also invest in googles and masks- but we will cover this in our tool blog post) You need to make sure you have good ventilation, windows or open doors to let potentially dangerous fumes escape.
Workbench:
Brand new workbenches can be expensive. My personal favourite are Emir workbenches (update 2024 no longer in business). They are solid and made of prime grade beech, so are hard wearing. However, they come with a price tag. I invested in mine with my first student loan payment. It was expensive and I couldn’t afford to go out for a few months, but it has lasted 13 years so far, and should last my whole career as a jeweller.
Another option is to ask a joiner to make one for you or you can make your own. You can purchase an oak or beech worktop and then make some legs out of pine timber from your local DIY supplier.
You could also find an existing solid table which you can convert into a workbench.
You can purchase a screw on bench peg and anvil for as little as £12 and it can screw onto most worktops (check the max opening width and compare against your table before purchasing). I like these bench pegs particularly, as you can be mobile and work anywhere. If I can’t work in the log cabin (my home workshop space) because I have to keep an eye on the children, I can bring in my bench peg and anvil and attach it to our dining room table to get a few bits done.

Generally, your chosen workbench needs to be around 90cm high and solid to withstand all you will do on it, hammering, soldering, piercing etc. If it wobbles or is too low so you have a bent back when working, you won’t see the best results in your work, and you will develop bad posture and back problems.
You could also try looking out for a second-hand bench, there are Facebook pages where people sell off tools and workbenches every now and then. If it isn’t for sale locally to you, you can always find a courier service to ship it to you for around £50. You can always check eBay and gumtree for second hand benches too.
Security:
Thieves can target you if they become aware you have tools in an outbuilding, nice people huh!?
You can get CCTV systems at an affordable price, Ring doorbells with CCTV motion sensors are also great as they can capture anyone who steps onto your property.
Invest in good door and window locks if your workshop is in the garden, and also an alarm system. These things are a lot cheaper now than they used to be, and many are wireless and can be installed easily. Choose a recognised brand that is reliable with good reviews.
I make sure I take in valuables each night such as expensive tools, any finished designs, expensive stones I may have in stock and my silver or gold. I generally work to order so I rarely carry any valuable materials or stones as it reduces the risk.
You can always look at purchasing a safe, make sure it is a good quality product though and secured properly. There is no point if it is small, easy to break into and can be lifted and carried away by the thief.
If you prepare as if you assume someone might try to rob you, then you have a good chance of protecting your tools and valuables. If it does happen, having all the protection measures such as CCTV will capture their ugly mug so you have a chance for prosecution and maybe, if you are lucky, you might see some of your tools again.
Try to avoid making it obvious you have a workshop. Don’t invite customers you don’t trust (which isn’t always easy to establish) to your workshop. There are various scams where people will try find out the address of your workshop space to rob you. One example is where they will email to ask if you have any gold wedding bands in stock for an urgent order, not because they are getting married soon, but because they want to see if you have lots of gold in stock that they can come and steal when you are not there. Trust no one, don’t keep lots of materials and stock and keep your space safe.
Lighting:
Without good lighting, you won’t be able to see what you are doing properly. Sometimes until you get your lighting right, you don’t quite realise how important it is. You can get some great clip on desk lamps which beauticians use, they emit a bright light and often have a magnification window on the top of the light.
My home workshop is north facing, so I do not get a great deal of light in, I have therefore had to set up various lights within the space to make sure I can see what I am doing. My desk light is bright and can be moved easily to direct the light just where I want it.
Storage:
Storage is key, to work effectively, it’s worth grouping together your tools so you can get to them easily. If you are working through a project and have to keep stopping to search for the correct tools, you will waste time and flow. For example, for soldering, you generally need your key equipment, soldering blocks and sheet, tweezers, solder, flux, brushes, water, pickle pot, etc. Keeping these tools together means they are all ready when you need to do some soldering.
In my home workshop and at Workshop 925 I have a soldering area ready to go. The mats and blocks are ready, and on the wall I use Ikea Fintorp wall storage metal buckets to store all the tools needed for soldering projects. They are made from metal so reduce fire risk plastic tubs or material wall hangers might have. Having them on the wall means the workbench space is kept clear.
Workbench space is valuable, too much on your bench can mean you lose things easily. Making the most of wall space helps you organise your tools while keeping them safe from getting damaged if you just chuck them on the bench, but it gets them out the way too. There is so much choice around, you can make it look attractive if you are worried about appearance.
Make it inviting:
Make your space feel nice and welcoming so you actually want to be in it. Sometimes you will hit times when you haven’t got much motivation to make something, or you hit a bit of an ideas design block, this is normal, but if your space isn’t very inspiring, you won’t want to work through these tougher periods.
A creative space can be a haven, somewhere you can escape life and just get lost in making. Take time to make that space yours. Paint the walls, floor (if it’s a concrete garage) buy wall vinyls, put up prints, whatever works for you.
Seating:
Seating is important, you can end up sitting for quite a while when you make jewellery. Your seat needs to be comfortable, support your back and neck, and be at a height that is suitable for your workbench. You should be eye level with your bench peg. You feel like a child at an adults table, but you are eye level with you bench peg so you don’t work with a curved back but actually sit up straight, and also, being eye level with your workbench, it means you can see your work properly.
Music / T.V:
Sometimes some background noise can keep you focused and your mind active as you make, particularly as most of us tend to work alone. It can also be good company. Some jewellers listen to audio books, others have old box sets on in the background as they work, some listen to their own playlists, and there is also the radio to keep you company too. If you prefer silence and that works for you, that’s great.
Fire Safety:
If you are soldering, do a bit of a risk assessment beforehand.
Don’t wave a soldering torch around your curtains, if you drop something hot onto the floor, will it burn a hole in your carpet or precious floor? Is your surface protected from the heat of the torch? Are other household members safe when you are soldering and aware it is a hot area where they may be chemicals? Are you prepared for the worst?
I don’t want to put anyone off, but you will be working with hazardous tools which does come with risk and thought, so prepare and then the risk is reduced.
Purchase a fire blanket or extinguisher (these items are good to have in the house anyway) Solder in a sensible place, check your flame can’t catch anything on fire within the surroundings of your soldering area. Tell family members where you are working and to avoid touching the tools, and to stay away from your work space (sometimes people fiddle because its interesting, but this can cause risk) Don’t rush your soldering, solder in a composed manner, prepare, and off you go!
Generally if you are starting out, I would say firstly, just go for it, don’t assume you don’t have space and funds. Buy tools gradually and build and build. My tool collection is 13 years and counting, I ask for tools for birthdays and Christmas, and save up for the bigger tools.
Secondly have the confidence to practice at home and get used to your tools and using your new skills. You will make mistakes, you will melt some things along the way, but that is all part of the art of learning, just learn and improve from these mistakes, and sometimes mistakes are golden and lead you onto a path or to form ideas you never expected!
We were all beginners once. Those further along have just had time to practice and refine their techniques. No one has ever finished learning, you can learn new skills every day, new methods and tricks, and learn from each other.
———————————————
I asked some of our students and tutors at Workshop 925 to share some images of their workspaces with us. It’s a great chance for me to be very nosey, but it’s also a great chance to see how everyone has set up their space. You can pick up lots of storage ideas seeing a wide range of workspaces. I also asked them to give me a top tip about setting up if they could. It takes a bit of time to optimise your space so some of these tips might give you food for thought…. .
Krista Thomson – Workshop 925 Tutor
“Get a good robust, secure work surface. A screw in bench peg with an anvil is great too”
Krista has a lovely workshop space here. She works from her spare room which she says is the box room. She has utilised wall space with a peg board. She has managed to fit in a rolling mill and drill which take up a lot of workbench space.
Being in her spare room, she can easily pop into her workshop to steal a few minutes of jewellery making around a busy schedule. If you work in an out building, you have to make more effort to put shoes on to go outside, and wait for it to warm up.

Stephen Barnett– Workshop 925 Tutor
“My top tip is great a good hard wood bench top not MDF like we did.”
Your workbench needs to be hard wearing. If it’s made from a soft wood such as pine or MDF it will dent easily, also MDF in particular can begin to strip back when it gets wet and doesn’t hold up should you drop things such as flux on it, which will happen.
Our workbenches at Workshop 925 are made with thick pine legs and solid 40mm oak worktops. The side benches are made of thick pine legs, and tops. The heavy work is done on the oak benches. The pine workbenches are showing a lot more wear than the oak workbenches. Oak or beech is more expensive of course, but it will last.

Amy Hubbard – Workshop 925 Tutor
“I would say my top tip (depending on the extent of the type of work you are doing) is safety first!
Make sure your surfaces are fire proof, have a fire extinguisher nearby. Protect everything in your space too – jewellery making can be dusty, smelly and dangerous, so don’t have anything else in the room that’s exposed and can get damaged.”
Amy works at a shop called Riordans, so this isn’t her home set up, but its still really handy to see her workspace and how she organises her tools.

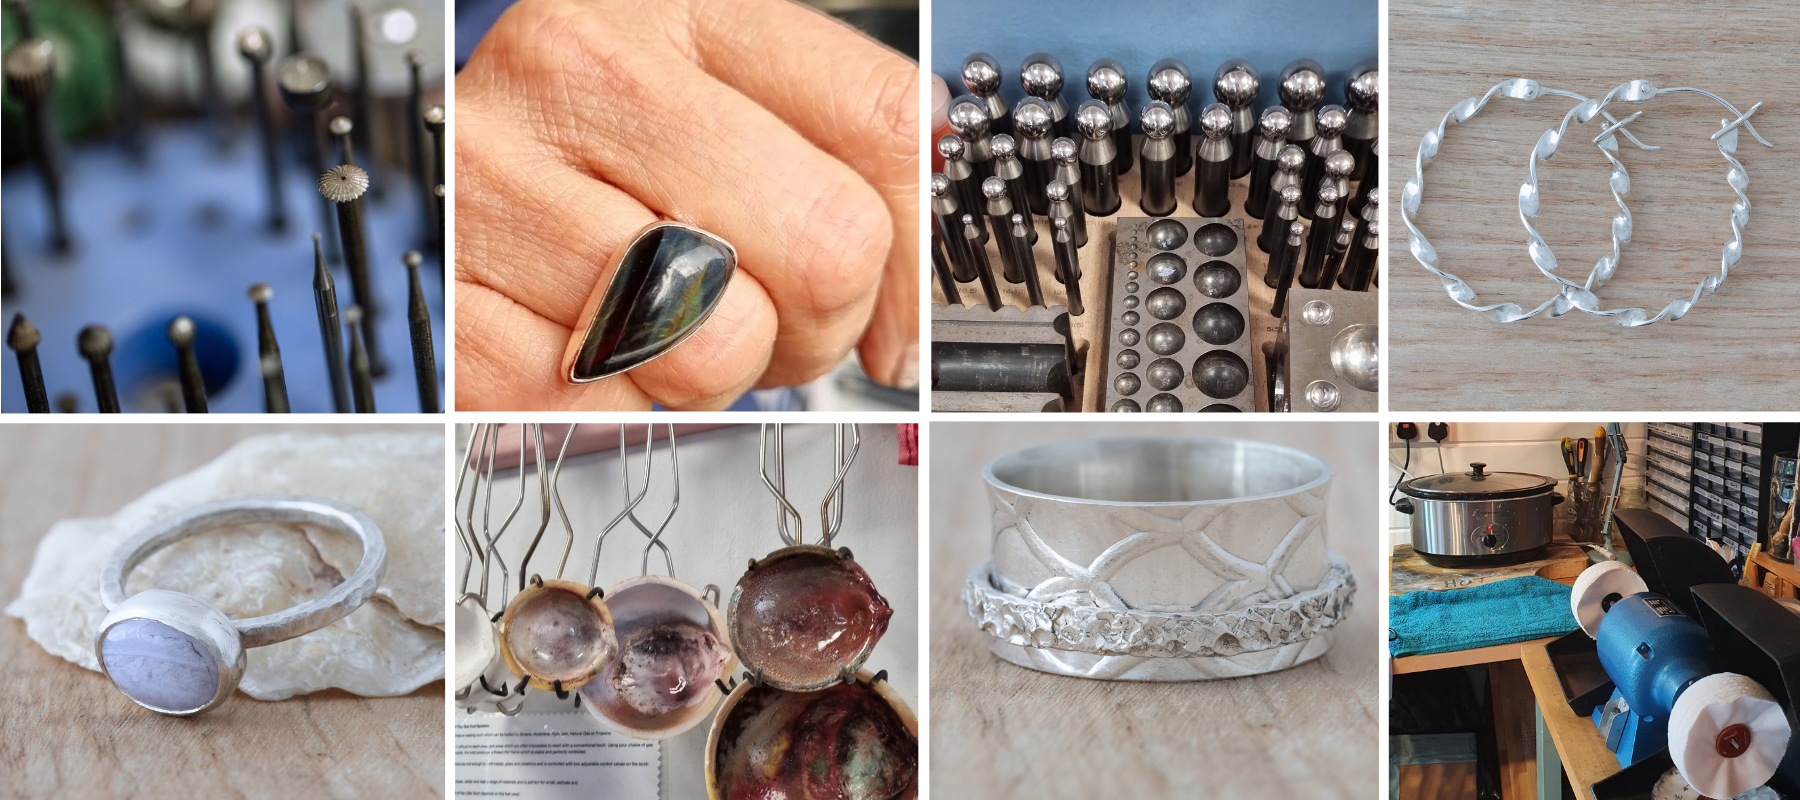
Charlotte Doe – AKA Circle and Dash
“The space is only 1.2m wide on my landing, but I have managed to make it work for now. My top tips would be a slow cooker for pickle, I got a mini one so it doesn’t take up much space and only costs about £15. I also think organisation is important, I use plastic takeaway containers a lot for work in progress and to sort trade orders into. I also love this compartmentalised tool box that I found in Hobbycraft it’s really useful to separate tools and projects, and great to use for taking spares to shows.”

“I just set up when needed until I get a proper workbench set up. I would suggest buying tools for each project to start with. I have gradually built up my collection of tools topping them up when needed. As I have progressed technically my collection has increased. Kirsten offers great guidance and using the Workshop for more difficult pieces with her tuition has been invaluable.”
Aww thanks Tracy!
We have tools at the workshop which take up a lot of room and have taken a lot of investment, such as a big rolling mill, a bench drill, Foredom pendant motors, an ultrasonic, polishing motor, Little Smith’s Torch etc. The benefit of Workshop 925 is you can use some great equipment which you might not have the space for at home, also the financial investment would be too big to justify.
Our next tool to arrive is a hydraulic press. I could never justify getting one for my home workshop due to the cost of the press alone and the tools that come with it. It would cost far too much for occasional use, also it takes time to make the press tools. However using it at our teaching workshop means you can have a good experiment with a range of tools and try new techniques without the investment- and I can too, yippeeeee.

“My tip would be… don’t be put off by only having a small space to work with, just be creative with it. Shot glasses are perfect for keeping lots of tiny bits or works in progress safe and you can write on the sides of them. The trolleys (from Hobbycraft) with the hanging bins, are so useful. They hold a lot of stuff and be moved into position.
Oh and a bin with a lid. Random I know, but it will save you hours”
Oh the bin dive! Its amazing how things can ping off your workbench and disappear, so a bin lid is a great tip from Vikki!


Jackie Lloyd Holland – AKA Studio Holland
“I’m really messy when I work and drag everything out but I always tidy things after I’ve finished, I definitely don’t have everything I’d like so I have to improvise, I also don’t have loads of space as the other part of the room is my office.”
Good point from Jackie here, trying to keep things tidy when you finish for the day, makes it inviting for when you come back to your workbench the next day. Also as Jackie says, to get every tool for every occasion, you will probably be in a lifetime of poverty, so improvise.

Jodi Kline – AKA Designs by JAK
“My workshop is what I wouldn’t suggest anyone do. I would re-do it if I could figure out how to get my big metal workshop table down the stairs and out of my house. I thought I knew better at the beginning because I didn’t understand why anyone would want a workshop bench made out of wood when you are using a torch. So stupid of me. So I am stuck with this heavy metal bench that is hard to clamp anything to. The lip of the workbench edge is not quite a wide Enough lip to clamp things on. They always come away from the desk if I use too much pressure”
Jodi makes such a valid point when starting out. It’s so hard to know what you are looking for workbench wise until you have done a bit of making.
I have made the very same mistakes as Jodi and ended up with workbenches that don’t quite work out, so she isn’t being stupid at all here. I also have had a few workbenches where my bench peg and anvil don’t clamp on because they are too thick. Setting up Workshop 925 has really tested me here; my worst purchase was something that was cheapish but claimed to be a solid workbench. It arrived, the drawers are wobbly, the whole thing wobbles from left to right and it’s definitely not good for heavy work. Anything I purchase that isn’t quite right, I try to adapt.

For Jodi, I have suggested getting a wooden worktop with a bigger overhang drilled into her metal work surface.
Here is a picture of our wobbly workbench at Workshop 925 that isn’t as solid as it suggested. It mades a great surface for all our doming punches, burrs and guillotine, not what I had in mind when I ordered it, but we have made it work for us while we awaited the ability to upgrade - it has now found a new home.

Sally Clark – AKA Sally Clark Jewellery
“I was really lucky that my husband is an artist blacksmith and had several tools and pieces of equipment I could use. I spent about £200 initially on tools & equipment and the rest my husband had. I’ve still got to save up for a Foredom drill and a tumbler.”
Sally has a lovely set up. She is gradually purchasing tools as she develops which is a really sensible move. She is also saving for good equipment rather than buying cheap versions. Foredom Pendant motors come with a great reputation and will help her with a range of techniques.

…and finally, me.
Here is my home workshop in my log cabin. I used to work in our spare room, but I got booted out upon the arrival of two children.
I love the log cabin space, its away from the bustle of home life, and its a space which I can call my own. It’s also nice it is all safely stored away from the kids, they are young at 3 and 5, and very curious.
I am aware of security and have taken many steps to make sure my tools are safe, I utilise alarms, CCTV, and locks, however bigger tools, and any stock I do ever carry are kept inside our home overnight to avoid risk.
I always want more tools, but I am limited by space. I would love a bench drill and big rolling mill, but I head over to Workshop 925 when I lack the equipment at home.


Leave a comment